说明
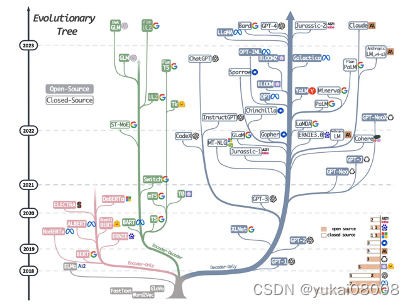
transformers 演变出了两个主要分支BERT(Encoder Only)和GPT(Decoder Only),中间分支的概念相对淡一些。
现在基本的一个模式是:
- 1 GPT可以处理相对复杂的问题,对于集成度更高的智力活动替代性比较强;随之而来的是使用成本相对高,就特定的问题处理还不如BERT的效果(效率可能会差的更多)
- 2 BERT可以处理相对简单的问题,效果和效率都不错。
本次的目的在与梳理和重建实体识别模型,来取得更好的效果。
内容
1 开始
这里有一篇文章(大规模语义表示模型的演进 ),介绍了NLP模型的一些发展情况。
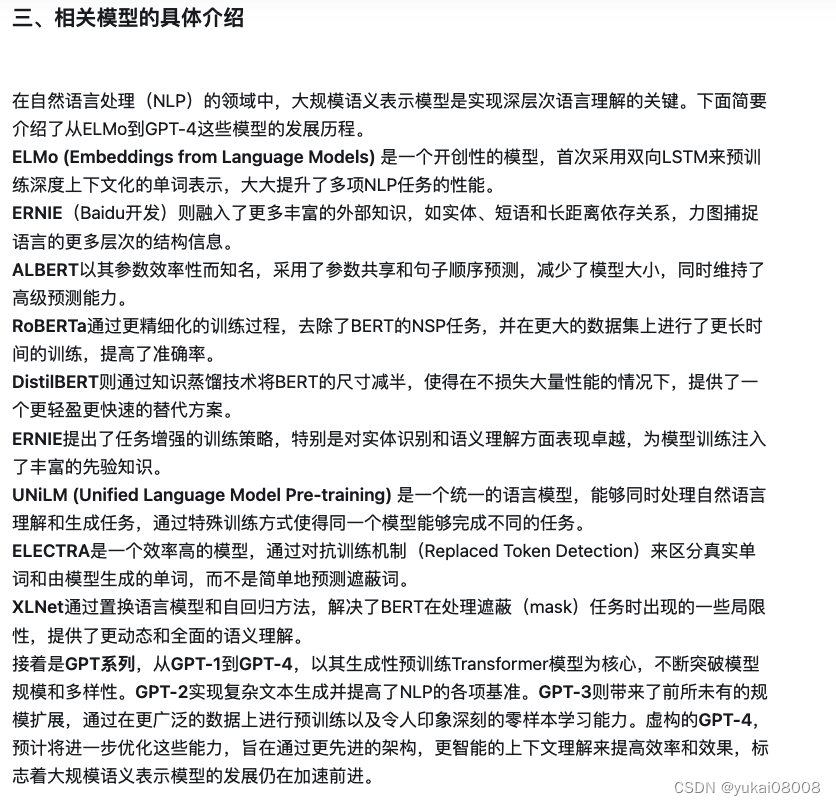
我原来用的是Electra,所以本次还是从它开始,但后续应该会扩大到ReBERTa和DistilBERT,来提供一个更全面的实体识别功能。
对于这个系列,我一直没有找到很清晰的路线,一直是处于大量使用,但是一知半解的状态。而且本次似乎也没有更大的进展,之后后续不断的堆时间。【任务:每天search 30分钟资料理解,可以以一篇小博客作为目标】
2 项目
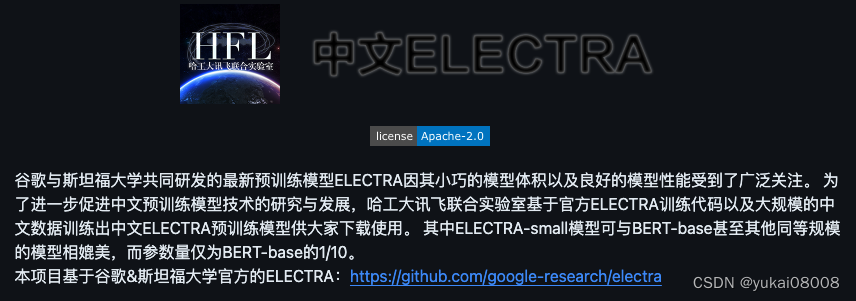
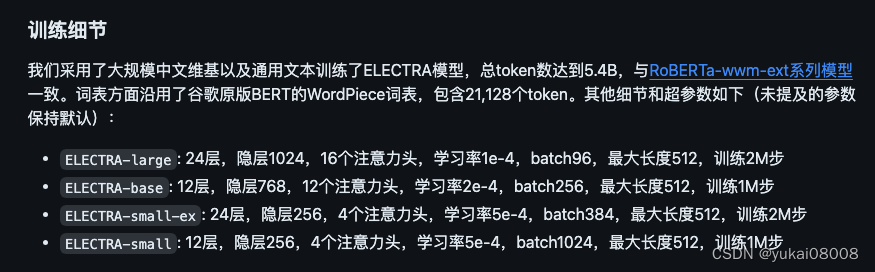
本次基于的项目是哈工大的一个预训练版本Chinese-ELECTRA, 说起来这个还是好几年前一个同事建议的。我最初是用BERT的,后来她建议用Electra,我们实验了一下,然后用两个模型输出进行抽样比对,发现小尺寸的Electra效果 >= 小尺寸的BERT效果,再加上开销小很多,所以我们切换成了Electra。
后来我自己又对Electra做了工程性的封装了改造,用了好几年。现在的挑战是业务的场景和要求提升/扩充了,想着重头整理一遍:
- 1 对以前的工程性方法进行Review,采用更新的标准方法。-- 这个目前看来是失败的,最终只是参考原来的版本进行了微小改动。一个很主要的原因是,官方(transformers)的文档看来很奇怪,可能我还没有很get到要点。
- 2 将多个过程采用微服务(前后端)化,最终称为流水线。-- 这个应该没有问题,但需要时间慢慢展开,估计1个月左右差不多。
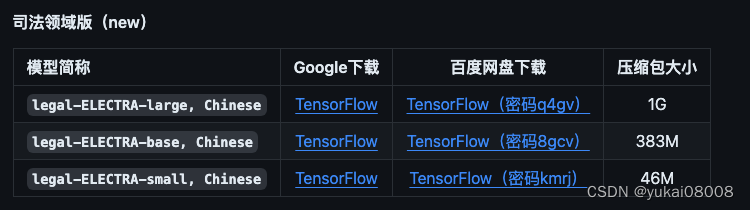
这个是项目介绍,结论( e small >= b base)基本是靠谱的。
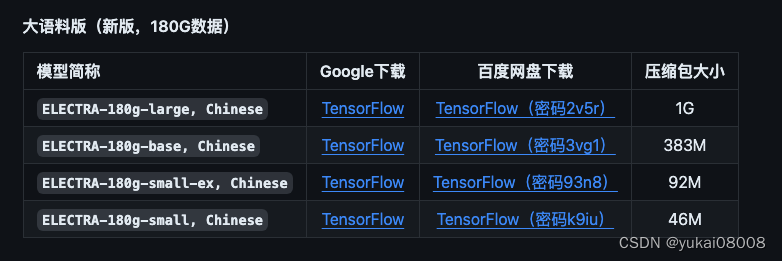
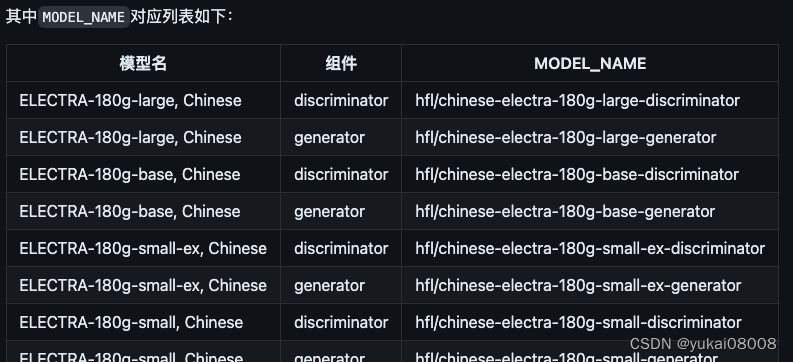
原来用的是small-ex版,这次打算使用 base版开始测试,甚至打算用large版。
甚至还可以考虑在业务领域使用特定的模型
使用pytorch,还是从hf上面直接下比较好。网络问题可以通过kaggle绕开。
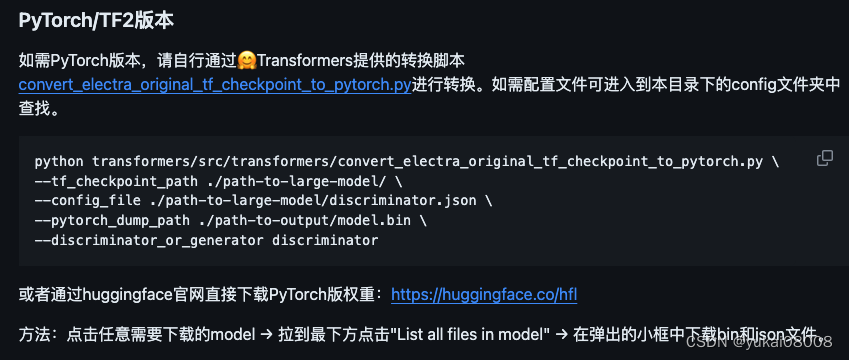
这个就先参考一下,以后钻到底层的时候可以用。
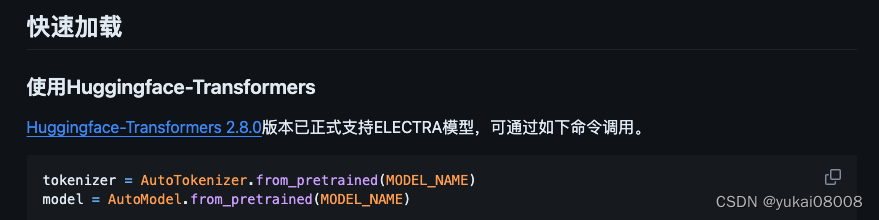
现在的transformers已经到了很后面了,不过AutoTokenizer和AutoModel仍然可以用。但是有些地方的确改了,算是小坑吧,后面再说。
electra采用类似GAN的结构,我们在做实体识别的时候,应该使用discrimantor。
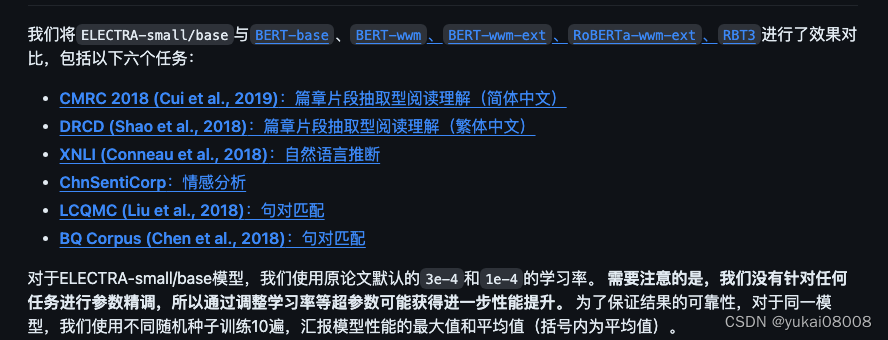
模型评估:看起来除了实体识别,Elec应该还可以用来做其他的任务,效果应该还可以。
- 1 简体中文阅读理解:根据给定问题,系统需要从篇章中抽取出片段作为答案,形式与SQuAD相同。
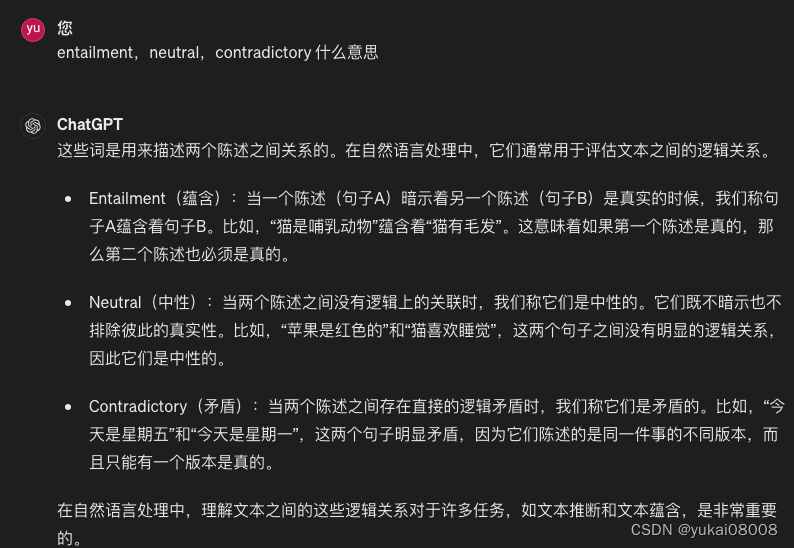
- 2 自然语言推断:XNLI。将文本分成三个类别:entailment,neutral,contradictory
- 3 情感分析:ChnSentiCorp。二分类的情感分类。
- 4 句对分类:一个句对进行分类,判断两个句子的语义是否相同(二分类任务)。
- 5 司法任务:罪名预测。看起来类似实体识别
BERT系模型应该可以有更多的用途,应该足以完成传统NLP的大多数任务,目的性更强,效率更高,更偏重批量生产。而在对这类业务数据进行准备和控制时,比较适合用GPT类模型。例如,为模型准备数据,以及评估模型效果时,GPT可以代替建模者的很多手工劳动。
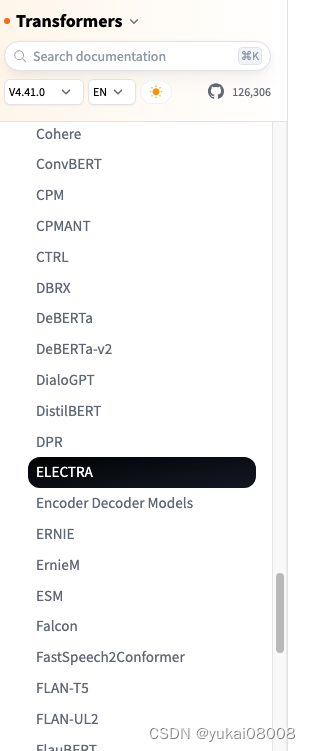
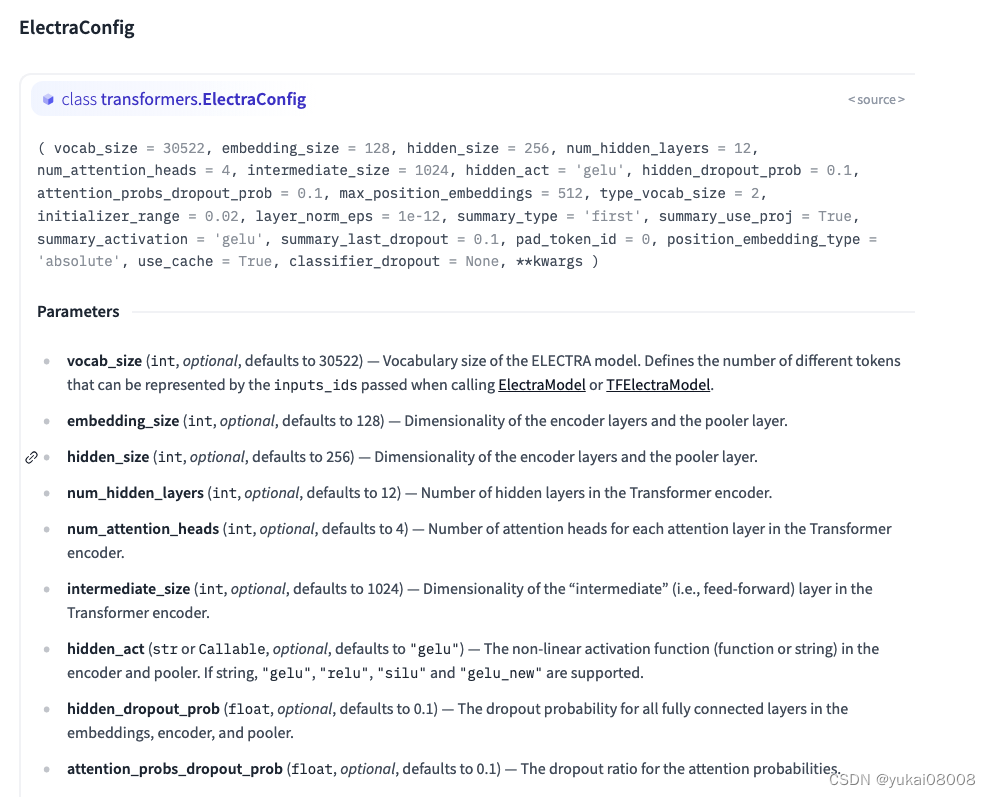
3 transformers
可以看到,transformers对多种模型都提供了支持
文档看来完全是从细节出发的,所以比较难看懂。更多的像是一个开发者的文档笔记,而不是以面向应用的文档。所以这次扫了一眼文档之后,感觉是没什么用。
pipleline: 这个应该是transformers比较成功的一个方法,它实现了快速的调用。但是可能也有点过于理想化:pipeline假设模型可以很好的对应业务需求,因此用户只要找到对应的模型,然后pipeline调用就可以了。实际上,
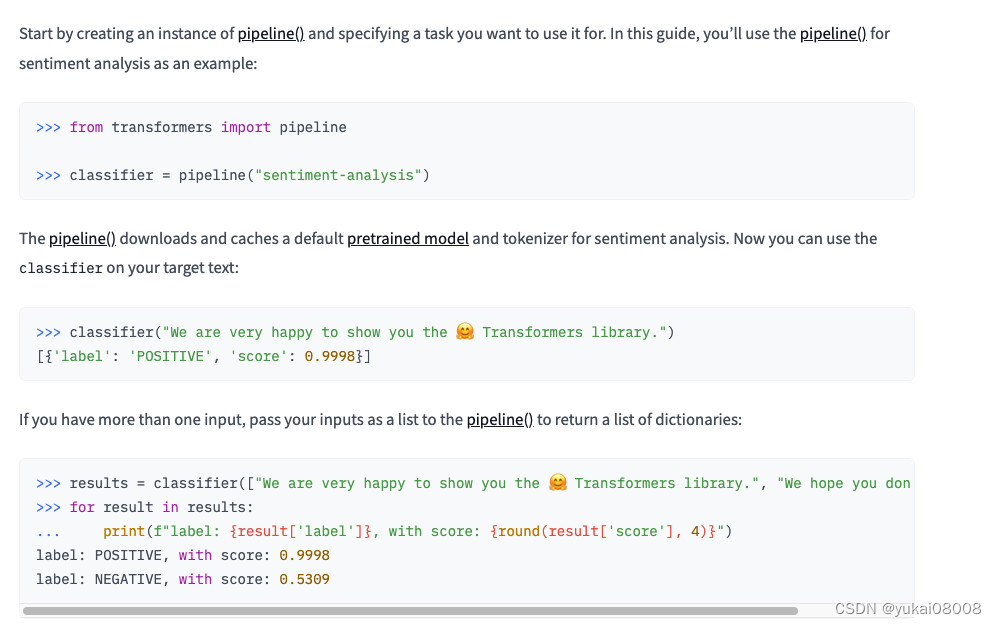
在quick tour中介绍了微调训练的步骤

接下来,介绍了对应的6个步骤。但由于一个模型可能有多种任务,所以这种信息的熵还是非常大的…
可以参考一下:
1 You’ll start with a PreTrainedModel or a torch.nn.Module:
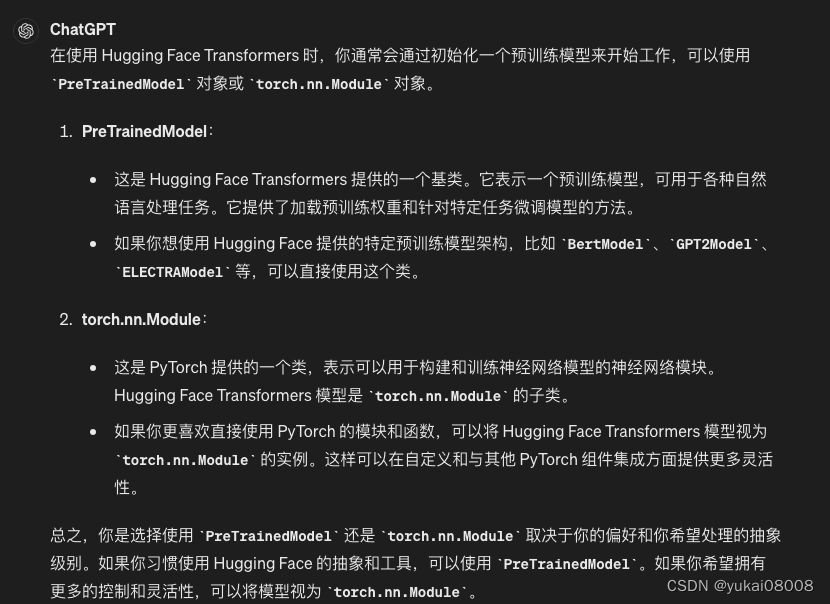
from transformers import AutoModelForSequenceClassification

model = AutoModelForSequenceClassification.from_pretrained("distilbert/distilbert-base-uncased")
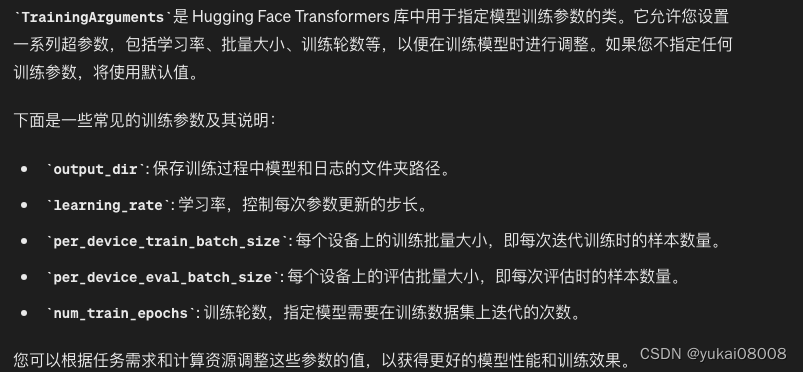
2 TrainingArguments contains the model hyperparameters you can change like learning rate, batch size, and the number of epochs to train for. The default values are used if you don’t specify any training arguments:
from transformers import TrainingArguments

training_args = TrainingArguments(
    output_dir="path/to/save/folder/",
    learning_rate=2e-5,
    per_device_train_batch_size=8,
    per_device_eval_batch_size=8,
    num_train_epochs=2,
)
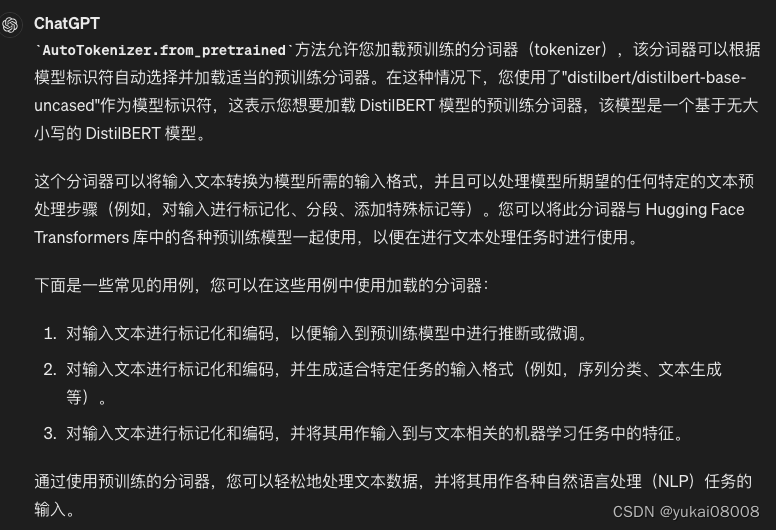
3 Load a preprocessing class like a tokenizer, image processor, feature extractor, or processor:
from transformers import AutoTokenizer

tokenizer = AutoTokenizer.from_pretrained("distilbert/distilbert-base-uncased")
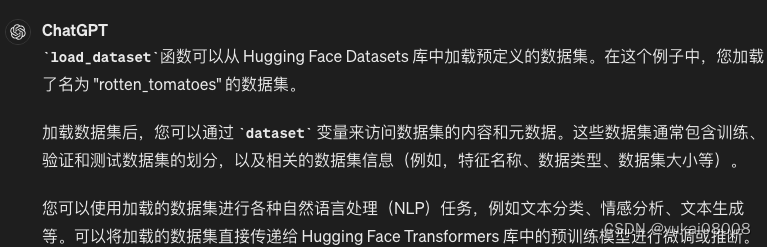
4 Load a dataset
from datasets import load_dataset

dataset = load_dataset("rotten_tomatoes")  # doctest: +IGNORE_RESULT
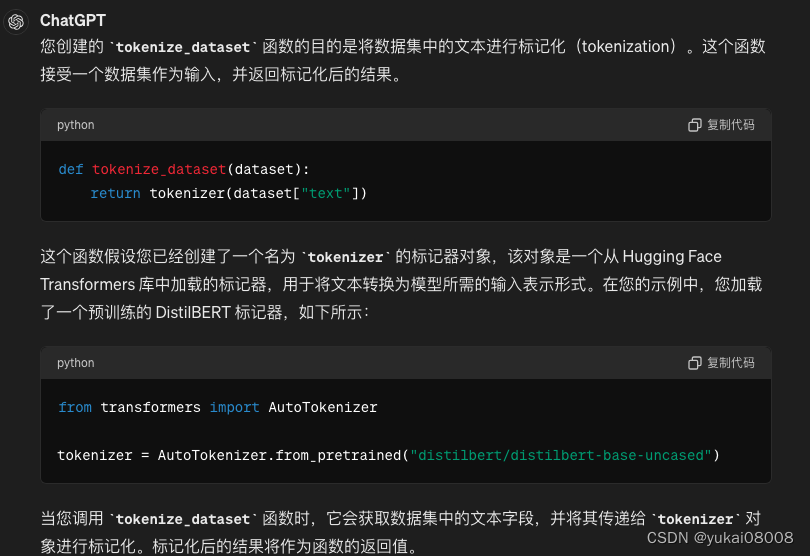
5 Create a function to tokenize the dataset
def tokenize_dataset(dataset):
    return tokenizer(dataset["text"])

Then apply it over the entire dataset with map:

dataset = dataset.map(tokenize_dataset, batched=True)
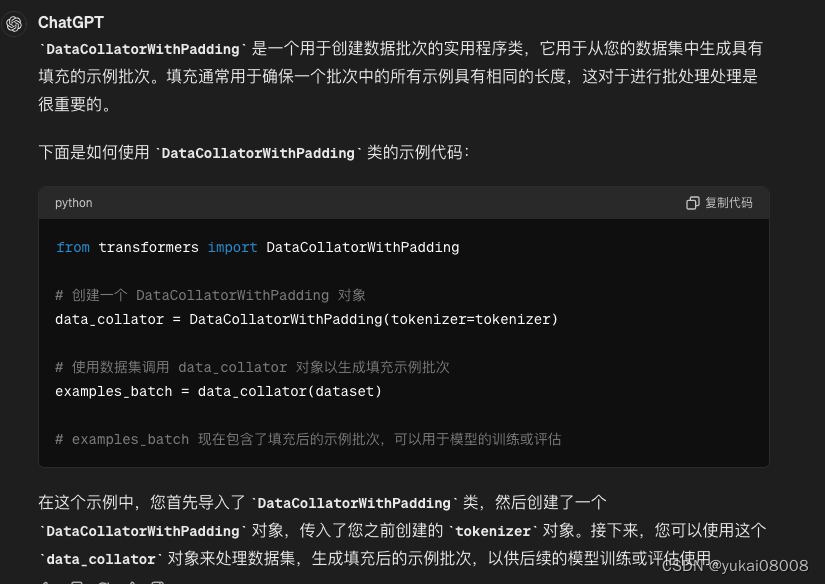
6 A DataCollatorWithPadding to create a batch of examples from your dataset:
from transformers import DataCollatorWithPadding
data_collator = DataCollatorWithPadding(tokenizer=tokenizer)
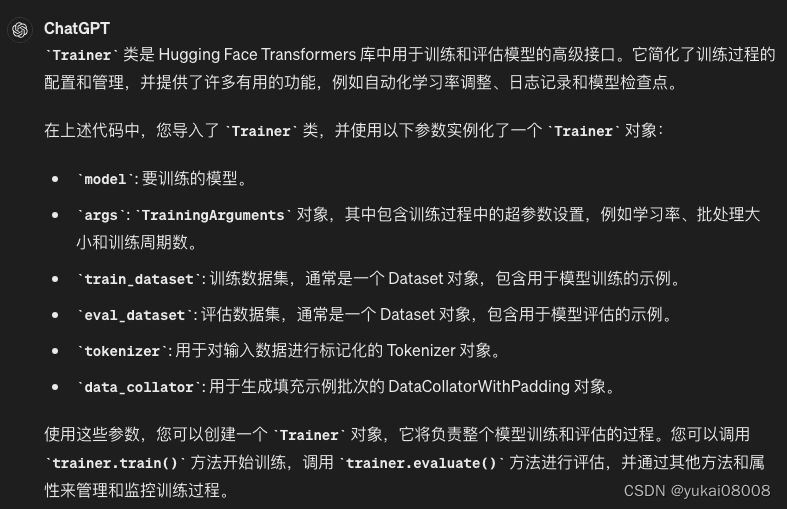
7 Now gather all these classes in Trainer
from transformers import Trainer

trainer = Trainer(
    model=model,
    args=training_args,
    train_dataset=dataset["train"],
    eval_dataset=dataset["test"],
    tokenizer=tokenizer,
    data_collator=data_collator,
)  # doctest: +SKIP
以上就是官方在quick tour里介绍的模型微调方法,乍一看有点麻烦,仔细一看,还真是有点麻烦。不过这个倒是和我之前封装的版本看起来是一致的,也算confirm了。
另外由于流程的复杂性,其实集中和分散可能都没太大差异:任何一步出问题都不得不停下来进去看
4 工程实践
4.1 数据准备
首先,模型如果不进行微调,基本上是不能用的。
如果要进行微调,应该至少要有上万条的标注数据。如果要完全手工标注,就太麻烦了,也太慢。一个办法是用现成的模型对数据进行预标注,然后通过规则筛掉可能的错误,最后再手工精修。当然,考虑到大模型,可把手工精修这部分工作交给大模型完成。
标准的训练数据应该是长这个样子的:

原来的实体识别模型只返回了小李、小吴这样的结果,没有返回预测的标记序列。另外,在最初没有考虑到类似LabelStudio的标注数据时,通常会假设得到的反馈也是小李、小吴这样的格式。所以,在原始数据转换的步骤上,我准备了一个微服务:
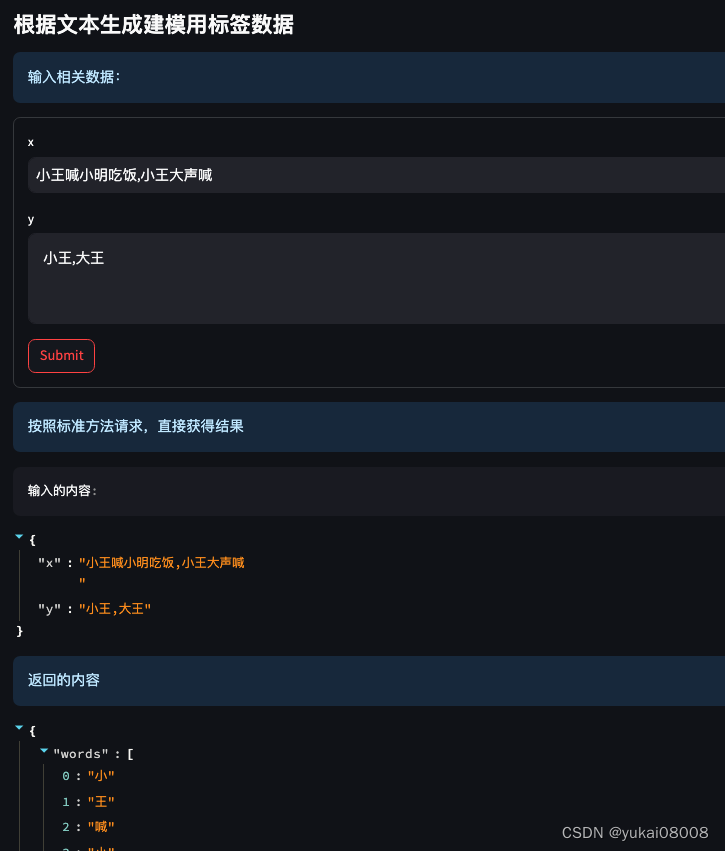
这里假定了模型只识别单实体,当然,本身BERT是可以一次性识别多个分类实体的。
所以,通过:
- 1 准备x,y数据
- 2 调用服务生成 words和tags数据,基本数据就准备好了
类似于

Tips
数据的预处理上,Elec(和BERT一样)需要对数据进行令牌化。这里有些细节记录一下。
在下载的模型文件有,有个vocab.txt,里面对几万个字符或类字符( #字 这种模式)进行了顺序编号。对汉字基本是按照字来进行拆分的。

tokenized之后,会形成一个字典,里面有 input_ids、token_type_ids和attention_mask,解释如下。
input_ids:包含了句子中每个词的ID。每个ID对应于BERT模型的词汇表中的一个词或者一个子词。
在这个例子中,每个子列表代表一个句子的词语ID序列。
token_type_ids:用于区分句子对的标识符。在单个句子输入的情况下,通常设置为全0。这个数据看起来是单句输入,因此所有的token_type_ids都是全0。
attention_mask:注意力掩码,用于指示哪些词语是有效的(1)和哪些是填充的(0)。这个数据中的所有词都是有效的,所以都被设置为1。 这里是输入数据中每个键的含义:

input_ids:代表每个词的ID序列,如 [101, 2207, 4374, 1591, 2207, 3209, 1391, 7649, 117, 2207, 4374, 1920, 1898, 1591, 102]。
在BERT模型中,[CLS] 和 [SEP] 分别表示句子的开头和结尾,因此 101 是 [CLS] 的ID,102 是 [SEP] 的ID。
中间的数字代表着句子中的其他词的ID。
token_type_ids:代表每个词的句子标识符,如 [[0, 0, 0, 0, 0, 0, 0, 0, 0, 0, 0, 0, 0, 0, 0], [0, 0, 0, 0, 0, 0, 0, 0, 0, 0]]。
在这个例子中,所有的标识符都是0,因为只有一个句子。
attention_mask:代表每个词的注意力掩码,如 [[1, 1, 1, 1, 1, 1, 1, 1, 1, 1, 1, 1, 1, 1, 1], [1, 1, 1, 1, 1, 1, 1, 1, 1, 1]]。
在这个例子中,所有的词都是有效的,因此都被设置为1。 这些特征已经准备好作为输入,可以直接输入给BERT模型进行处理。
4.2 环境搭建
我租用了算力主机,然后使用jupyterlab开发。感觉一张3080应该就够了,之后如果有需要可以再换。
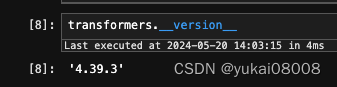
transformers.__version__
'4.39.3'

torch.__version__
'2.0.1'

!nvidia-smi

Mon May 20 17:54:11 2024
+---------------------------------------------------------------------------------------+
| NVIDIA-SMI 545.23.08              Driver Version: 545.23.08    CUDA Version: 12.3     |
|-----------------------------------------+----------------------+----------------------+
| GPU  Name                 Persistence-M | Bus-Id        Disp.A | Volatile Uncorr. ECC |
| Fan  Temp   Perf          Pwr:Usage/Cap |         Memory-Usage | GPU-Util  Compute M. |
|                                         |                      |               MIG M. |
|=========================================+======================+======================|
|   0  NVIDIA GeForce RTX 3080        On  | 00000000:07:00.0 Off |                  N/A |
|  0%   31C    P8              14W / 320W |      5MiB / 10240MiB |      0%      Default |
|                                         |                      |                  N/A |
+-----------------------------------------+----------------------+----------------------+

+---------------------------------------------------------------------------------------+
| Processes:                                                                            |
|  GPU   GI   CI        PID   Type   Process name                            GPU Memory |
|        ID   ID                                                             Usage      |
|=======================================================================================|
|  No running processes found                                                           |
+---------------------------------------------------------------------------------------+
连通性测试
4.3 处理流程
4.3.1 获取数据
连接clickhouse
chc = CHClient(host = host, port = port , database = database, user = user, password = password, name = name )
the_sql = 'show tables'
chc._exe_sql(the_sql)
[('train_ner_news_title_org_20240517',)]
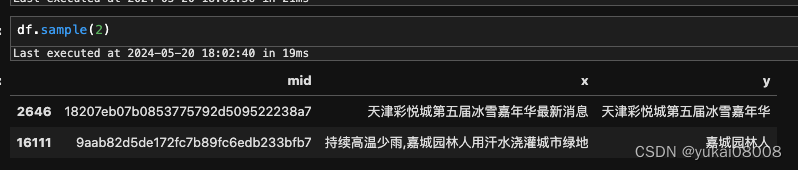
直接将训练数据集抓过来
# 取数
data_tuple_list = chc.get_table('train_ner_news_title_org_20240517')
Last executed at 2024-05-20 18:01:17 in 3.14s

df = pd.DataFrame(data_tuple_list, columns = ['mid', 'x', 'y'])
可以看出来,老模型(基于另一类数据训练)的识别还是存在偏差的。不过考虑到即使是人工打标,也会存在错漏,所以可以先试试看。
4.3.2 转BIO序列标注
将x,y数据提交,将x转为字列表,然后将y转为BIO序列。通过服务化的方式会更好。因为每个API的功能相对是单一的,然后又按照json格式约束了输入和输出。
# 将x和y的句子提交解析
import requests as req
data_listofdict = list(cols2s(df, cols= ['x','y'], cols_key_mapping= ['x','y']))
data_listofdict_l2 = slice_list_by_batch2(data_listofdict, 1000)

import tqdm
parse_res_list = []
for some_list in tqdm.tqdm(data_listofdict_l2):
    kwargs = {'some_listofdict':some_list}
    pack_func = 'Parse.unit_transform_s'

    some_dict = {}
    some_dict['kwargs'] = kwargs
    some_dict['pack_func'] = pack_func

    res = req.post('http://IP:PORT/gfgo/', json = some_dict).json()
    parse_res_list.append(res)
有一些数据会处理失败,可以先不管
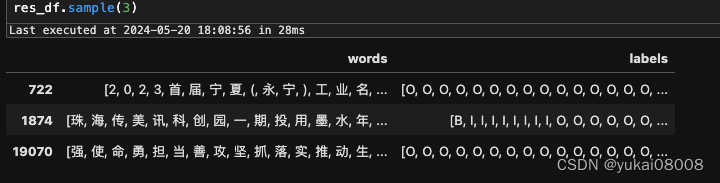
parse_res_list_flat = flatten_list(parse_res_list)
parse_res_list_flat.count('error')
144

parse_res_list_flat1 = [x for x in parse_res_list_flat if x !='error']
res_df = pd.DataFrame(parse_res_list_flat1)
4.3.3 切分数据集
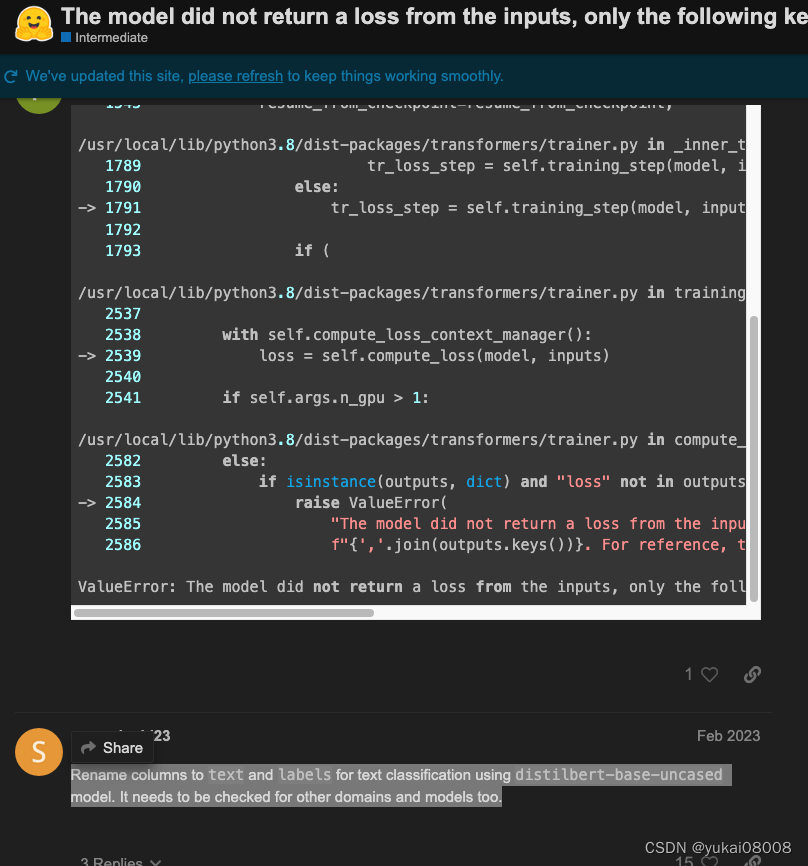
先要对数据集做一些转换。主要注意的是words必须要改为text, 然后tags必须要命名为labels。这个bug也挺诡异的,我在这里找到了一个类似的答案,然后试了下,发现的确是这样。这个错会在训练时报错,很是让人崩溃。我判断下来,应该是某个版本改规范了,这会导致原来的命名发没有输入,当然也就没有loss,也就无法迭代。
import numpy as np
import datasets
from datasets import Dataset, load_dataset, load_metric, ClassLabel, Sequence
# 替换tag中间的连字符
def str_rplc(str_list):
    return [i.replace('_', '-') for i in str_list]

label_list = ['B','I','O']
class_label = ClassLabel(names=label_list)

data_df = pd.DataFrame()
data_df['text'] = list(res_df['words'])
data_df['tags'] =  list(res_df['labels'])
data_df['ner_tags'] = data_df['tags'].apply(str_rplc)
data_df['labels'] = data_df['ner_tags'].apply(class_label.str2int)

data_df.head()

关键信息是text和labelsz字段,特别是labels,根据B、I、O进行映射,转为了数值。这个也必须要做,否则会出错。逻辑上,要进行大规模的计算和迭代时,数据都要转为向量。在scikit learn时代开始其实就是这样的。很多时候只是pipeline让使用者忽略了这一点。
然后按照6,2,2的方式,分为训练,验证和测试集。
# train, validate, test -> 6:2:2
train_df, val_df, test_df = np.split(data_df.sample(frac=1, random_state=42), [int(.6*len(data_df)), int(.8*len(data_df))])
然后,又是一个转换
data_set = Dataset.from_pandas(data_df)
train_set = Dataset.from_pandas(train_df)
val_set = Dataset.from_pandas(val_df)
test_set = Dataset.from_pandas(test_df)
这个Dataset应该是transfomers配套的数据类型,有点像字典,也有点像DataFrame
train_set
Dataset({
    features: ['text', 'tags', 'ner_tags', 'labels', '__index_level_0__'],
    num_rows: 15832
})
4.3.4 令牌化:作为标准的模型输入
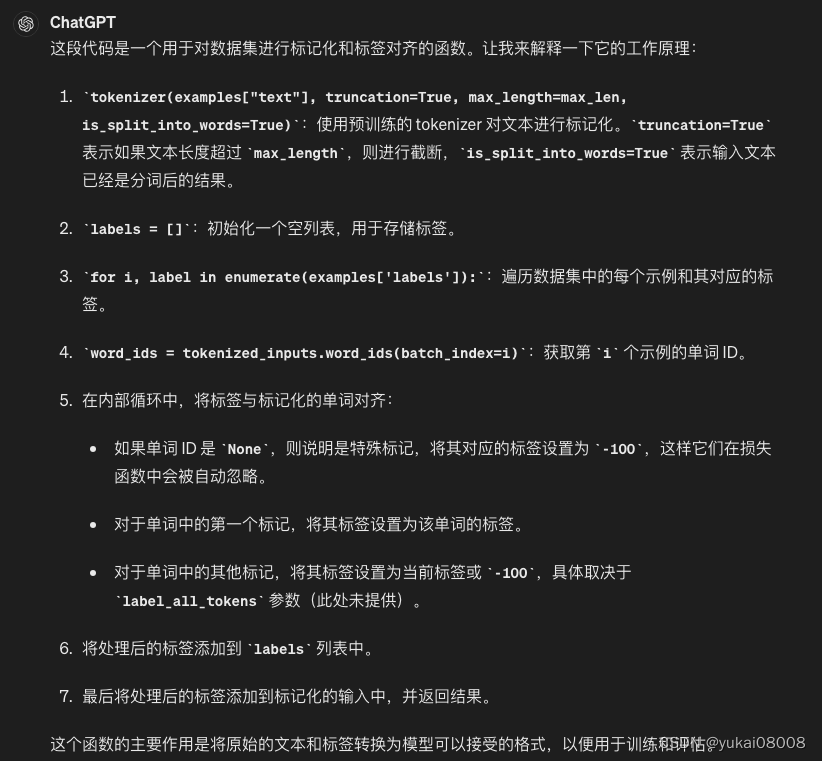
然后又来一个定制函数tokenize_and_align_labels
def tokenize_and_align_labels(examples):
    tokenized_inputs = tokenizer(examples["text"], truncation=True, max_length=max_len, is_split_into_words=True)
    labels = []
    # 测试
    for i, label in enumerate(examples['labels']):
        word_ids = tokenized_inputs.word_ids(batch_index=i)
        previous_word_idx = None
        label_ids = []

        for word_idx in word_ids:
            # Special tokens have a word id that is None. We set the label to -100 so they are automatically
            # ignored in the loss function.
            if word_idx is None:
                label_ids.append(-100)
            # We set the label for the first token of each word.
            elif word_idx != previous_word_idx:
                label_ids.append(label[word_idx])
            # For the other tokens in a word, we set the label to either the current label or -100, depending on
            # the label_all_tokens flag.
            else:
                print('error')
                # label_ids.append(label[word_idx] if label_all_tokens else -100)
            previous_word_idx = word_idx

        labels.append(label_ids)
    tokenized_inputs['labels'] = labels
    return tokenized_inputs
之前我倒是用dataframe的方式也做了处理,这步是没有问题。可是之后要进行训练的时候是不接受dataframe的,所以这个也没辙。之后只能再了解一下他们dataset的设计。
4.3.5 训练
将分割后的数据转换
tokenizer = AutoTokenizer.from_pretrained(model_checkpoint)
tokenized_trainset = train_set.map(tokenize_and_align_labels, batched=True)
tokenized_valset = val_set.map(tokenize_and_align_labels, batched=True)
tokenized_testset = test_set.map(tokenize_and_align_labels, batched=True)

这部分和官方示例很像
from transformers import DataCollatorForTokenClassification
from transformers import TrainingArguments, Trainer
batch_size = 16

# 设置参数
args = TrainingArguments(
    "test-ner",
    evaluation_strategy = "epoch",
    learning_rate = 2e-5,
    per_device_train_batch_size = batch_size,
    per_device_eval_batch_size = batch_size,
    num_train_epochs = 10,
    weight_decay = 0.01
)

args.device
载入模型
from transformers import AutoTokenizer, AutoModelForTokenClassification

model = AutoModelForTokenClassification.from_pretrained(model_checkpoint, num_labels=len(label_list))
data_collator = DataCollatorForTokenClassification(tokenizer)
评估部分
import seqeval
metric = load_metric("seqeval")
# metric
def compute_metrics(p):
    predictions, labels = p
    predictions = np.argmax(predictions, axis=2)

    # Remove ignored index (special tokens)
    true_predictions = [
        [label_list[p] for (p, l) in zip(prediction, label) if l != -100]
        for prediction, label in zip(predictions, labels)
    ]
    true_labels = [
        [label_list[l] for (p, l) in zip(prediction, label) if l != -100]
        for prediction, label in zip(predictions, labels)
    ]

    results = metric.compute(predictions=true_predictions, references=true_labels)
    return {
        "precision": results["overall_precision"],
        "recall": results["overall_recall"],
        "f1": results["overall_f1"],
        "accuracy": results["overall_accuracy"],
    }
训练器
trainer = Trainer(
    model,
    args,
    train_dataset = tokenized_trainset,
    eval_dataset = tokenized_valset,
    data_collator = data_collator,
    tokenizer = tokenizer,
    compute_metrics = compute_metrics
)

trainer.train()
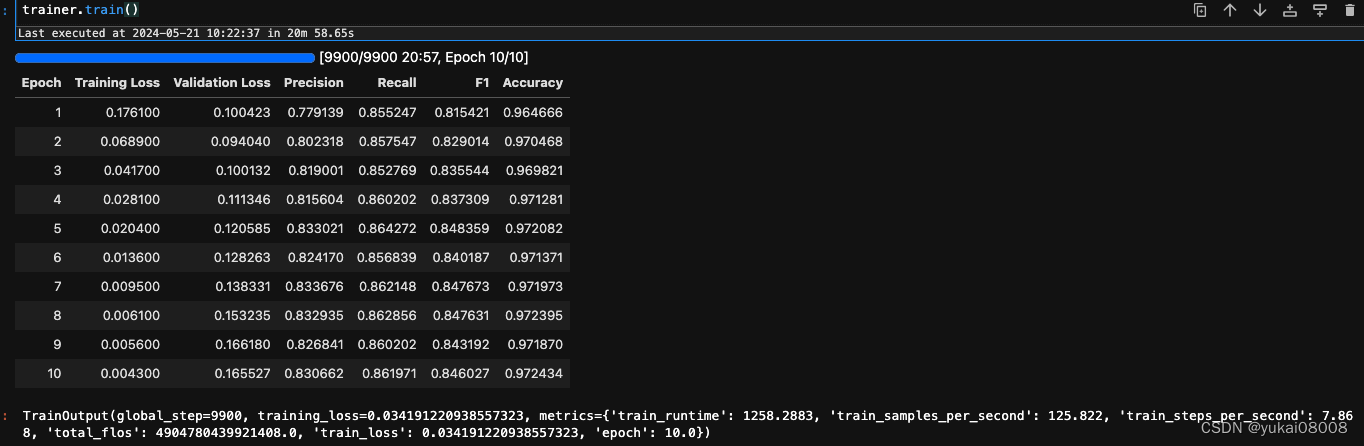
训练时间不长,30分钟左右就好了
看下评估结果: precision和recall都很一般。当然也有可能是我最初给的训练文件就不是那么正确,模型实际可能更好,但是在指标上体现不出来。这个后续再看。
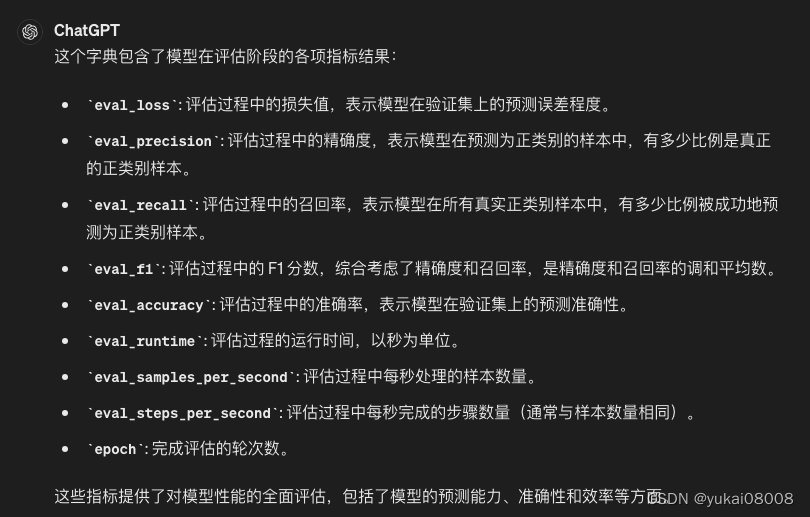
trainer.evaluate()
{'eval_loss': 0.16621793806552887,
 'eval_precision': 0.8316509837467921,
 'eval_recall': 0.8602017342063352,
 'eval_f1': 0.8456854558107167,
 'eval_accuracy': 0.9719726706324558,
 'eval_runtime': 13.9468,
 'eval_samples_per_second': 378.438,
 'eval_steps_per_second': 23.661,
 'epoch': 10.0}
等效于
predictions, labels, _ = trainer.predict(tokenized_valset)
predictions = np.argmax(predictions, axis=2)

# Remove ignored index (special tokens)
true_predictions = [
    [label_list[p] for (p, l) in zip(prediction, label) if l != -100]
    for prediction, label in zip(predictions, labels)
]
true_labels = [
    [label_list[l] for (p, l) in zip(prediction, label) if l != -100]
    for prediction, label in zip(predictions, labels)
]

results = metric.compute(predictions=true_predictions, references=true_labels)
results

{'_': {'precision': 0.8316509837467921,
  'recall': 0.8602017342063352,
  'f1': 0.8456854558107167,
  'number': 5651},
 'overall_precision': 0.8316509837467921,
 'overall_recall': 0.8602017342063352,
 'overall_f1': 0.8456854558107167,
 'overall_accuracy': 0.9719726706324558}
4.3.6 模型保存
将模型保存到model01文件夹下面
trainer.save_model('./model01/')
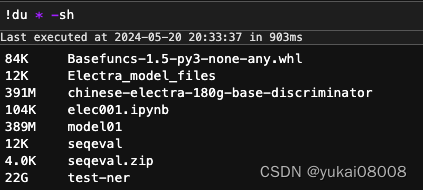
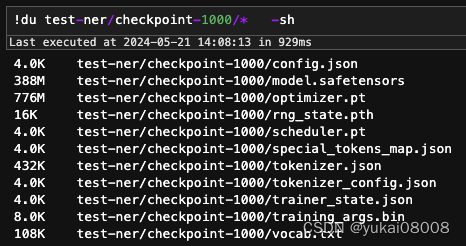
可以看到模型的尺寸不大,不过在过程中的checkpoint文件还是比较大的。每个checkpoint的文件都不小。

可以查看一下,有一个优化器文件很大
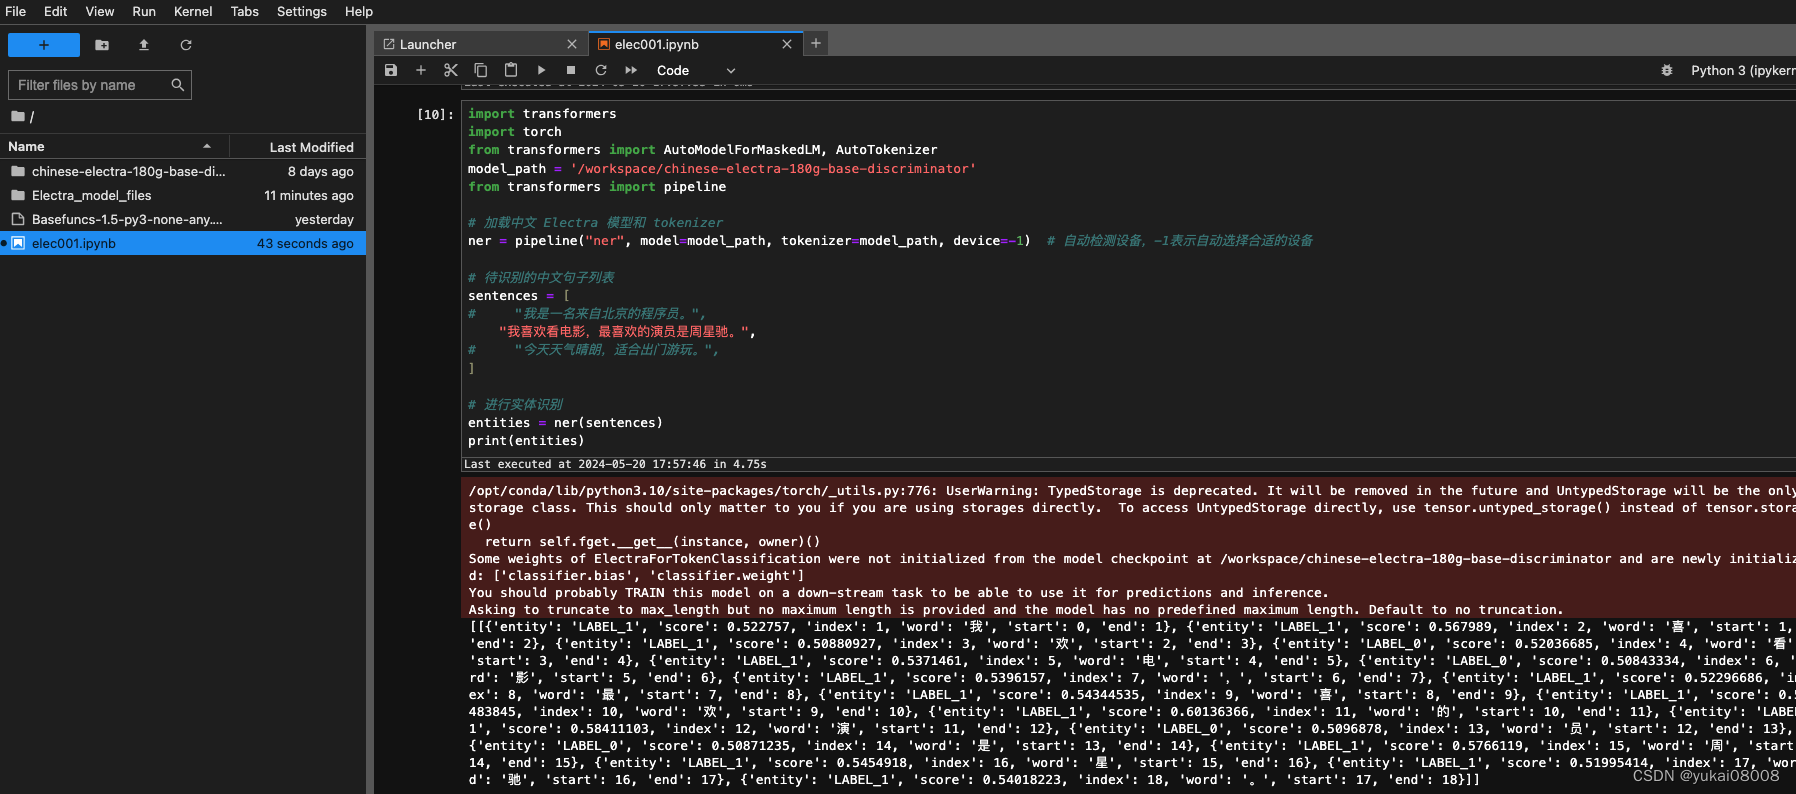
4.3.7 使用
最快速的使用方式,使用pipeline。
import transformers
import torch
from transformers import AutoModelForMaskedLM, AutoTokenizer
xmodel_path = 'model01'
from transformers import pipeline

# 加载中文 Electra 模型和 tokenizer
ner = pipeline("ner", model=xmodel_path, tokenizer=xmodel_path, device=-1)  # 自动检测设备,-1表示自动选择合适的设备
将句子按照数据列表准备
# 待识别的中文句子列表
sentences = [
# "我是一名来自北京的程序员。",
"我喜欢看电影,最喜欢的演员是周星驰。",
# "今天天气晴朗,适合出门游玩。",
]
sentences = [
''.join(data_df['text'].iloc[0]),
''.join(data_df['text'].iloc[1]),
''.join(data_df['text'].iloc[2])
]
# 进行实体识别
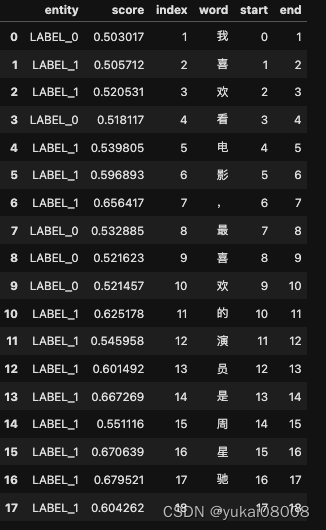
entities = ner(sentences)
print(entities)
按照BIO的方式,我之前给的label_list 是 [‘B’,‘I’,‘O’],所以这个句子全部是O,没有实体(我标注的是机构实体)。

下面这个例子则展示了对两个机构实体的识别。0对应于B, 1对应于I,2对应O。这样就可以找出实体了。

5 小结
到这里,已经把一个模型的基本训练从找到预训练模型,搭建环境,直到微调新模型,保存和应用都梳理了一遍。篇幅太长,到这里先分割一下,另起一篇接着说应用。