FastDDS是eprosima公司开发的DDS(Data Distribution Service)库,使用的语言是C++,自称是"The Most Complete Open Source DDS Middleware",其官网是https://eprosima.com/,FastDDS源码在https://github.com/eProsima/Fast-DDS
FastDDS的协议是Apache-2.0 license,使用免费,咨询收费。
本文讲述在Ubuntu下如何源码编译FastDDS,并运行其自带例子。相关软件版本如下,
- FastDDS:2.14.1,也是当前文章写作时的最新release版本
- 系统:Ubuntu 22.04, 内核版本是5.15.153.1
- GCC版本:11.4.0
一 下载相关代码
1. 下载Fast-DDS
执行下面命令下载,
git clone https://github.com/eProsima/Fast-DDS.git
下载完后出现目录Fast-DDS,cd进入Fast-DDS目录,然后切换到2.14.1的分支,这点很重要,
cd Fast-DDS
git checkout remotes/origin/2.14.1
因为本文使用2.14.1分支,所以需要切换过来,不然就是master分支了。
切换好之后可以使用git branch -a来查看当前所在分支,如下,

2. 下载子模块
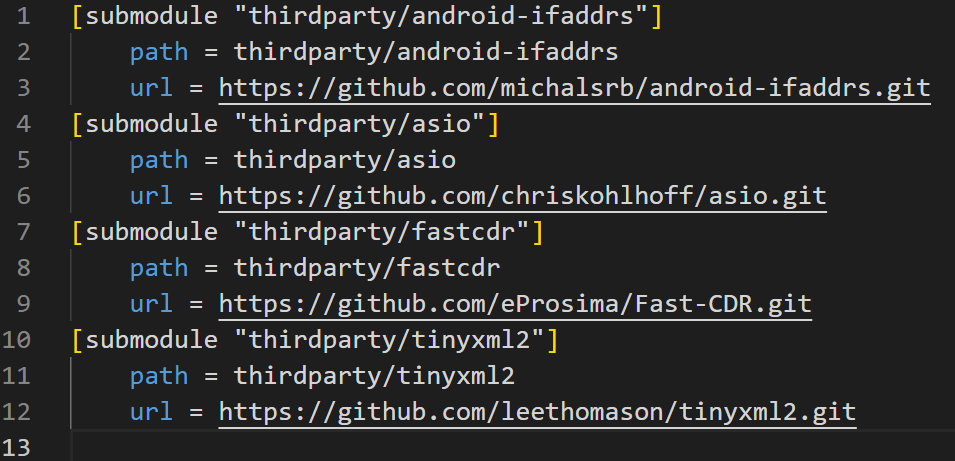
FastDDS的编译依赖一些子模块,打开Fast-DDS/.gitmodules可以看到需要的子模块,如下,有4个,
这里在Fast-DDS目录下执行下面命令来下载子模块,
git submodule update --init --recursive
下载完毕后,可以在Fast-DDS/thirdparty/下查看
3. 下载foonathan_memory
这个也是Fast-DDS需要的依赖库,需要单独下,其地址是https://github.com/foonathan/memory,
执行下面命令进行下载
git clone https://github.com/foonathan/memory
下载完后出现目录memory
二 编译
1. 搭建简单工程
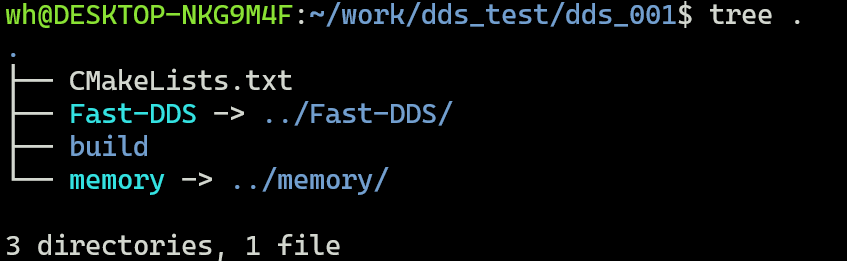
这里搭建一个简单CMake工程来控制编译,可以让整个过程非常清晰干净,首先创建一个目录,这里叫dds_001,和Fast-DDS以及memory在同一个目录下(可以根据自己的实际情况选择其它地方创建目录),

然后cd进入dds_001,使用软链接命令ln创建Fast-DDS和memory的软链接,
ln -s ../Fast-DDS Fast-DDS
ln -s ../memory memory
最后创建文件CMakeLists.txt和创建目录build,整体目录结构如下,
这样我们就可以通过CMake来控制编译了
2. 编译安装fastcdr,tinyxml2和foonathan_memory
CMakeLists.txt内容如下,
cmake_minimum_required(VERSION 3.20)

project(demo)

add_subdirectory(./Fast-DDS/thirdparty/fastcdr)
add_subdirectory(./Fast-DDS/thirdparty/tinyxml2)
add_subdirectory(./memory)
cd到build目录,然后执行下面命令,
cmake .. && make
编译完毕后,执行安装,
sudo make install
2. 编译安装asio
asio是不依赖boost的C++网络库,它不用cmake,用的autoconf,所以先要安装autoconf
sudo apt install autoconf
然后进入asio目录,位置在Fast-DDS/thirdparty/asio/asio/,接着执行下面命令进行编译安装
./autogen.sh
./configure
make
sudo make install
3. 编译FastDDS
至此,依赖库都已经准备好了,这里就可以编译FastDDS,回到工程的CMakeLists.txt,改成如下,
cmake_minimum_required(VERSION 3.20)

project(demo)

# add_subdirectory(./Fast-DDS/thirdparty/fastcdr)
# add_subdirectory(./Fast-DDS/thirdparty/tinyxml2)
# add_subdirectory(./memory)

add_subdirectory(./Fast-DDS)
然后cd进入build目录,接着执行下面的命令,
rm -rf *
cmake -DCOMPILE_EXAMPLES=ON ..
make -j2
等待一会就可以编译完成了。这里同时把自带例子也编译了。
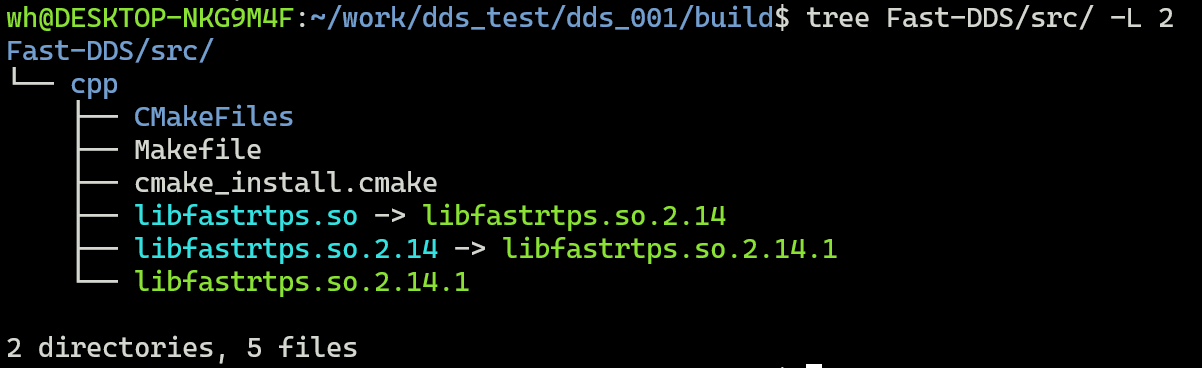
编译完成后生成的库文件在build/Fast-DDS/src/下,
三 运行例子
最后运行FastDDS自带的例子HelloWorldExample,位于build/Fast-DDS/examples/cpp/dds/HelloWorldExample/,
打开一个终端,运行publisher,如下,
./DDSHelloWorldExample publisher
然后打开另外一个终端,运行subscriber,如下,
./DDSHelloWorldExample subscriber
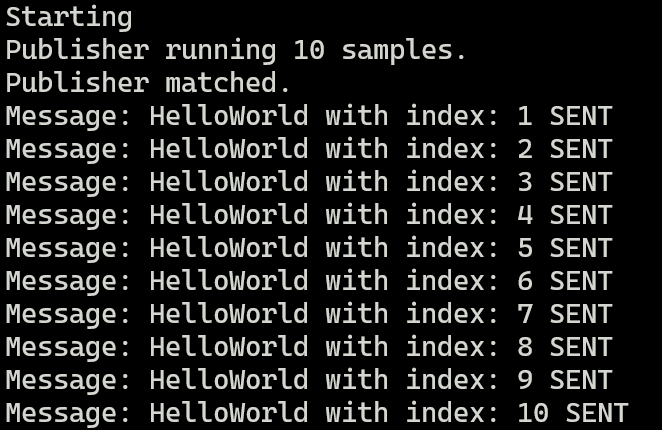
最后publisher这边打印如下,
subscriber这边打印如下,
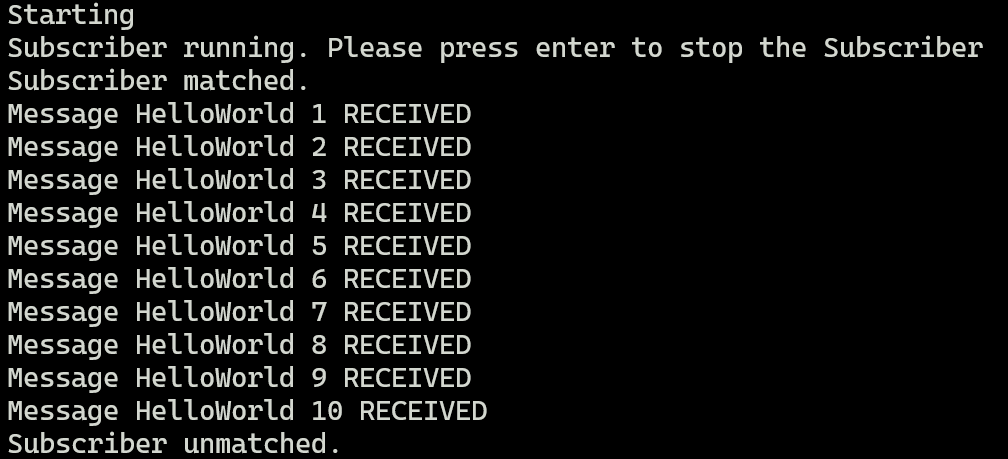
这样例子就运行成功了。
四 小结
本文讲述了在Ubuntu下如何源码编译FastDDS,并进行简单测试。可以看出FastDDS有很多依赖库,编译不是太简单,侧面说明它是个比较大的工程项目。
另外,还有一个比较新的DDS开源库:Cylone DDS,其官网是https://cyclonedds.io/,github地址是https://github.com/eclipse-cyclonedds/cyclonedds,这个库的源码编译就比较简单了,感兴趣的读者可以看下。