目录
概述
本文主要介绍使用文件操作方式控制GPIO 的方法,笔者介绍export IO的实现方式,如何配置IO的方向属性,以及写IO状态的方法。还编写了一个测试代码,方便对这些接口有一个更直观的认识和了解。
1 IOT-9608I-L的GPIO
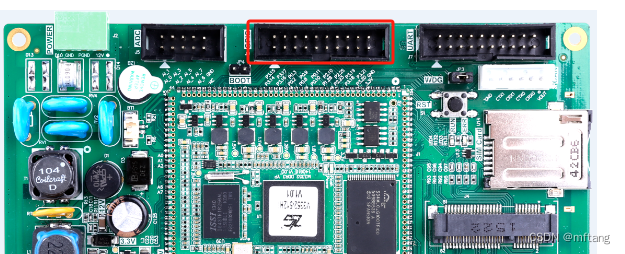
1.1 认识硬件
IOT-9608I-L板卡提供18个GPIO接口,其可以作为普通的IO使用。由于该板卡所有的和板卡自带的硬件相关的驱动已经被做好了,所以,对于使用者来说,只需编写应用程序即可,无需关注驱动程序问题(前提是: 我们默认驱动程序足够健壮)
1.2 IO引脚和MCU的对应关系
| 引脚 | 名称 | 说明 | 引脚 | 名称 | 说明 | |
|---|---|---|---|---|---|---|
| 1 | P3.14 | GPIO3_14/SPI_SCLK | 2 | P3.15 | GPIO3_15/SPI_D0 | |
| 3 | P3.16 | GPIO3_16/SPI_D1 | 4 | P3.17 | GPIO3_17/SPI_CS | |
| 5 | P0.2 | GPIO0_2 | 6 | P0.3 | GPIO0_3 | |
| 7 | P0.8 | GPIO0_8 | 8 | P0.9 | GPIO0_9 | |
| 9 | P2.22 | GPIO2_22 | 10 | P2.24 | GPIO2_24 | |
| 11 | P1.28 | GPIO1_28 | 12 | P1.12 | GPIO1_12 | |
| 13 | P2.23 | GPIO2_23 | 14 | P2.25 | GPIO2_25 | |
| 15 | P3.18 | GPIO3_18 | 16 | P3.19 | GPIO3_19 | |
| 17 | P3.20 | GPIO3_20 | 18 | P3.21 | GPIO3_21 | |
| 19 | 3.3V | 3.3V电源输出 | 20 | GND | 电源地 |
1.3 板卡IO驱动列表
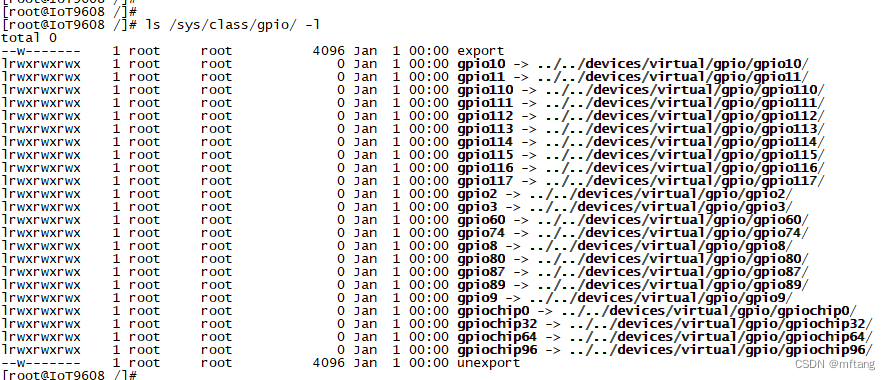
使用如下命令查看板卡中IO的列表
ls /sys/class/gpio/ -l执行命令后,可以看见如下log信息
2 C程序代码操作GPIO
2.1 export GPIO
在user空间操作IO时,需要export IO,其目的是将IO所在的目录导出,方便后续的操作。进入/sys/class/gpio/ 目录可以看见如下信息: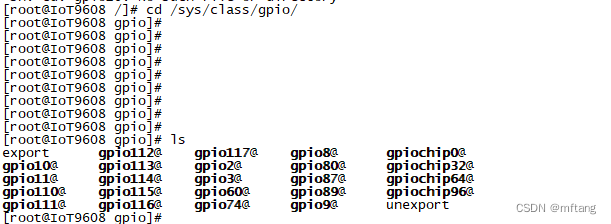
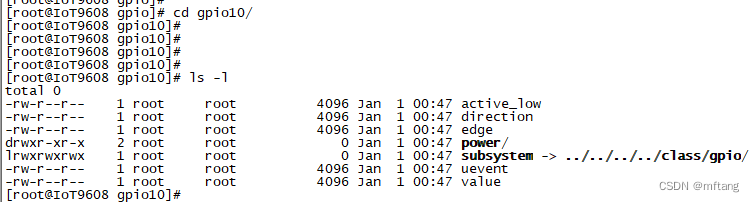
在进入要操作的gpio驱动目录,本文选择gpio10,进入gpio10目录,列出和IO操作的相关属性item:
export IO的范例:
#define SYSFS_GPIO_EXPORT           "/sys/class/gpio/export"
#define SYSFS_GPIO_PORT_PIN_VAL     "10"

int export_gpio( void )
{
    int fd;

    // open the io port: /sys/class/gpio# echo 10 > export
    fd = open(SYSFS_GPIO_EXPORT, O_WRONLY);
    if(fd == -1)
    {
        printf("error: %s \n", SYSFS_GPIO_EXPORT);
        return EXIT_FAILURE;
    }

    write(fd, SYSFS_GPIO_PORT_PIN_VAL ,sizeof(SYSFS_GPIO_PORT_PIN_VAL));
    close(fd);

    return 0;
}
2.2 设置direction
要对IO操作,必须配置IO的direction 的属性,使其处于输入或者输出状态,以实现读或者写状态。
设置direction的范例:
#define SYSFS_GPIO_PORT_DIR         "/sys/class/gpio/gpio10/direction"
#define SYSFS_GPIO_PORT_DIR_VAL     "OUT"

void set_gpio_direction( void )
{
    int fd;

    // set the io direction: /sys/class/gpio/gpio10# echo out > direction
    fd = open(SYSFS_GPIO_PORT_DIR, O_WRONLY);
    if(fd == -1)
    {
        printf("error: %s\n", SYSFS_GPIO_PORT_DIR);
        return EXIT_FAILURE;
    }
    write(fd, SYSFS_GPIO_PORT_DIR_VAL, sizeof(SYSFS_GPIO_PORT_DIR_VAL));
    close(fd);

    return 0;
}
2.3 输出模式写IO
配置完成端口输入或者输出属性之后,然后就可以对IO进行读写操作了,其写操作方法如下:
#define SYSFS_GPIO_PORT_VAL         "/sys/class/gpio/gpio10/value"
#define SYSFS_GPIO_PORT_VAL_H       "1"
#define SYSFS_GPIO_PORT_VAL_L       "0"


void gpio_write_status(void)
{
    int fd;
    int  count = 10;

    // test the io port
    fd = open(SYSFS_GPIO_PORT_VAL, O_RDWR);
    if(fd == -1)
    {
        printf("error: %s \n", SYSFS_GPIO_PORT_VAL);
        return EXIT_FAILURE;
    }

    while( count-- )
    {
        write(fd, SYSFS_GPIO_PORT_VAL_H, sizeof(SYSFS_GPIO_PORT_VAL_H));
        sleep(1);
        write(fd, SYSFS_GPIO_PORT_VAL_L, sizeof(SYSFS_GPIO_PORT_VAL_L));
        sleep(1);
    }

    close(fd);

}
3 使用实例
3.1 功能介绍
使用C语言方式操作GPIO_10,其操作步骤如下
1)配置IO为输出
2)设置IO为高电平
3)设置IO为低电平
3.2 代码实现
详细代码如下:
/***************************************************************
Copyright  2024-2029. All rights reserved.
文件名     : gpio_output_test.c
作者       : tangmingfei2013@126.com
版本       : V1.0
描述       : IOT_9608 IO端口测试程序
其他       : 无
日志       : 初版V1.0 2024/04/27
***************************************************************/
#include <stdlib.h>
#include <stdio.h>
#include <string.h>
#include <unistd.h>
#include <fcntl.h>
#include <time.h>

//demo for  P0_10
#define SYSFS_GPIO_EXPORT           "/sys/class/gpio/export"
#define SYSFS_GPIO_PORT_PIN_VAL     "10"

#define SYSFS_GPIO_PORT_DIR         "/sys/class/gpio/gpio10/direction"
#define SYSFS_GPIO_PORT_DIR_VAL     "OUT"

#define SYSFS_GPIO_PORT_VAL         "/sys/class/gpio/gpio10/value"
#define SYSFS_GPIO_PORT_VAL_H       "1"
#define SYSFS_GPIO_PORT_VAL_L       "0"

int main()
{
    int count = 10;
    int fd;

    // open the io port: /sys/class/gpio# echo 10 > export
    fd = open(SYSFS_GPIO_EXPORT, O_WRONLY);
    if(fd == -1)
    {
        printf("error: %s \n", SYSFS_GPIO_EXPORT);
        return EXIT_FAILURE;
    }
    write(fd, SYSFS_GPIO_PORT_PIN_VAL ,sizeof(SYSFS_GPIO_PORT_PIN_VAL));
    close(fd);

    // set the io direction: /sys/class/gpio/gpio10# echo out > direction
    fd = open(SYSFS_GPIO_PORT_DIR, O_WRONLY);
    if(fd == -1)
    {
        printf("error: %s\n", SYSFS_GPIO_PORT_DIR);
        return EXIT_FAILURE;
    }
    write(fd, SYSFS_GPIO_PORT_DIR_VAL, sizeof(SYSFS_GPIO_PORT_DIR_VAL));
    close(fd);

    // test the io port
    fd = open(SYSFS_GPIO_PORT_VAL, O_RDWR);
    if(fd == -1)
    {
        printf("error: %s \n", SYSFS_GPIO_PORT_VAL);
        return EXIT_FAILURE;
    }

    while( count-- )
    {
        write(fd, SYSFS_GPIO_PORT_VAL_H, sizeof(SYSFS_GPIO_PORT_VAL_H));
        sleep(1);
        write(fd, SYSFS_GPIO_PORT_VAL_L, sizeof(SYSFS_GPIO_PORT_VAL_L));
        sleep(1);
    }

    close(fd);

    printf(" finish the task! \n");

    return 0;
}