一、环境准备
1、服务版本
Linux 采用 Ubuntu 22.04
Nginx 采用 Nginx-1.24.0 安装目录/opt/nginx
Mysql 采用 Mysql-5.7.23 安装目录/opt/mysql
PHP 采用 PHP-7.3.5 安装目录/opt/phpRedis 采用 Redis 5.0.12
2、配置apt源
# 备份
cp /etc/apt/sources.list{,_bak}

# 修改源文件如下
deb https://mirrors.aliyun.com/ubuntu/ jammy main restricted universe multiverse
deb-src https://mirrors.aliyun.com/ubuntu/ jammy main restricted universe multiverse

deb https://mirrors.aliyun.com/ubuntu/ jammy-security main restricted universe multiverse
deb-src https://mirrors.aliyun.com/ubuntu/ jammy-security main restricted universe multiverse

deb https://mirrors.aliyun.com/ubuntu/ jammy-updates main restricted universe multiverse
deb-src https://mirrors.aliyun.com/ubuntu/ jammy-updates main restricted universe multiverse

# deb https://mirrors.aliyun.com/ubuntu/ jammy-proposed main restricted universe multiverse
# deb-src https://mirrors.aliyun.com/ubuntu/ jammy-proposed main restricted universe multiverse

deb https://mirrors.aliyun.com/ubuntu/ jammy-backports main restricted universe multiverse
deb-src https://mirrors.aliyun.com/ubuntu/ jammy-backports main restricted universe multiverse
3、测试
apt-get update
apt-get install wget
二、部署Nginx服务
1、下载第三方依赖
apt-get install zlib1g zlib1g-dev libpcre3 libpcre3-dev openssl libssl-dev build-essential libtool gcc make2、下载Nginx源码包
wget https://nginx.org/download/nginx-1.24.0.tar.gz3、解压
tar -zxvf nginx-1.24.0.tar.gz4、编译三部曲
4.1 创建工作目录
mkdir -p /opt/nginx4.2 执行编译脚本
# 进入解压目录
cd 解压目录/nginx-1.24.0

# 执行编译脚本
./configure --prefix=/opt/nginx --with-http_ssl_module --with-http_flv_module --with-http_gzip_static_module --with-http_stub_status_module --with-threads --with-file-aio
4.3 编译
make4.4 安装
make install5、配置环境变量
ln -s /opt/nginx/sbin/nginx /usr/bin/nginx

# 创建Nginx工作用户
useradd -r -s /sbin/nologin nginx
6、修改配置环境
vi /opt/nginx/conf/nginx.conf

# 修改配置如下
# 工作用户为nginx
user  nginx;
worker_processes  2;

error_log  logs/error.log;

pid        logs/nginx.pid;


events {
    worker_connections  1024;
}


http {
    include       mime.types;
    default_type  application/octet-stream;

    log_format  main  '$remote_addr - $remote_user [$time_local] "$request" '
                      '$status $body_bytes_sent "$http_referer" '
                      '"$http_user_agent" "$http_x_forwarded_for"';

    access_log  logs/access.log  main;

    sendfile        on;
    #tcp_nopush     on;

    keepalive_timeout  65;

    gzip  on;
    # gzip压缩等级,有1-9级,级别越高压缩率越高,但传输时间越久
    gzip_comp_level 4;
    # gzip支持压缩的文件类型
    gzip_types text/plain application/javascript application/x-javascript text/css application/xml text/javascript application/x-httpd-php image/jpeg image/png image/jpg;
    # nginx支持的gzip版本,默认使用1.0
    gzip_http_version 1.1;
    # 引用extra目录下的配置文件

    include extra/*.conf;

}
7、配置虚拟站点配置文件
mkdir -p /opt/nginx/conf/extra

vi /opt/nginx/conf/extra/test.conf
# 配置如下
server {
    listen  80;
    server_name localhost;

    location / {
        root /opt/www/html;
        index index.html;
    }
}


# 测试配置是否正确
nginx -t
8、编写启动脚本
vi /etc/systemd/system/nginx.service

[Unit]
Description=Nginx server by fortunate
Documentation=man:nginx(8)
After=network.target
After=syslog.target

[Install]
WantedBy=multi-user.target

[Service]
Type=forking
ExecStart=/opt/nginx/sbin/nginx
ExecReload=/opt/nginx/sbin/nginx -s reload
ExecStop=/opt/nginx/sbin/nginx -s stop
PrivateTmp=true
9、启动服务
systemctl daemon-reload
systemctl start nginx.service
systemctl enable nginx.service
10、测试
10.1 创建站点目录
mkdir -p /opt/www/html10.2 编写index.html文件
echo "welocome to Nginx" > /opt/www/html/index.html10.3 浏览器查看

三、部署MySQL服务
1、下载MySQL源码包
wget https://downloads.mysql.com/archives/get/p/23/file/mysql-5.7.23-el7-x86_64.tar2、解压
# 解压缩后会有两个tar.gz包
tar -xvf mysql-5.7.23-el7-x86_64.tar

tar -zxvf mysql-5.7.23-el7-x86_64.tar.gz
3、修改配置
# 创建工作目录
mv mysql-5.7.23-el7-x86_64/ /opt/mysql

# 创建mysql用户
useradd -r -s /sbin/nologin mysql

# 创建数据和日志存放目录
mkdir -p /opt/mysql/data
mkdir -p /opt/mysql/logs

# 修改权限
chown -R mysql: /opt/mysql/data
chown -R mysql: /opt/mysql/logs

# 创建mysql配置文件
vi /etc/my.cnf

# 服务端配置
[mysqld]
basedir=/opt/mysql/
datadir=/opt/mysql/data/
socket=/tmp/mysql.sock
server_id=1
port=3306
log_error=/opt/mysql/logs/mysql_error.log
character-set-server=utf8mb4
collation-server=utf8mb4_unicode_ci

# 客户端配置
[mysql]
socket=/tmp/mysql.sock
4、编译
# 安装依赖
apt-get install libncurses5:amd64

# 执行编译脚本
/opt/mysql/bin/mysqld --initialize-insecure --user=mysql --basedir=/opt/mysql/ --datadir=/opt/mysql/data/
5、配置环境变量
vi /etc/profile

# 最后添加一行配置
PATH="${PATH}:/opt/mysql/bin/"

# 加载配置
source /etc/profile
6、创建启动脚本
vi /etc/systemd/system/mysql.service

[Unit]
Description=MySQL server by fortunate
Documentation=man:mysqld(8)
Documentation=http://dev/mysql.com/doc/refman/en/using-systemd.html
After=network.target
After=syslog.target

[Install]
WantedBy=multi-user.target

[Service]
User=mysql
Group=mysql
ExecStart=/opt/mysql/bin/mysqld --defaults-file=/etc/my.cnf
LimitNOFIL=5000
7、启动服务
systemctl daemon-reload

# 启动服务
systemctl start mysql.service

# 设置开机自启动
systemctl enable mysql.service
8、测试
# 首次登录,不需要输入密码,直接回车即可
mysql -uroot -p


Enter password:
Welcome to the MySQL monitor.  Commands end with ; or \g.
Your MySQL connection id is 2
Server version: 5.7.23 MySQL Community Server (GPL)

Copyright (c) 2000, 2018, Oracle and/or its affiliates. All rights reserved.

Oracle is a registered trademark of Oracle Corporation and/or its
affiliates. Other names may be trademarks of their respective
owners.

Type 'help;' or '\h' for help. Type '\c' to clear the current input statement.

mysql> show databases;
+--------------------+
| Database           |
+--------------------+
| information_schema |
| mysql              |
| performance_schema |
| sys                |
+--------------------+
4 rows in set (0.00 sec)

mysql>
四、部署PHP服务
1、安装依赖
apt-get install build-essential libxml2 libxml2-dev libpcre3-dev libjpeg-dev libfreetype6-dev libpng-dev libcurl4-openssl-dev libonig-dev libzip-dev libcurl4-gnutls-dev libxslt1-dev

# 对culr目录添加软连接
find / -name "easy.h"
ln -s easy_dir/curl /usr/include/curl

# 查看版本,至少需要1.1.0
xslt-config --version

# 下载openssl,Ubuntu默认安装的openssl不支持PHP7.x以上版本
wget https://www.openssl.org/source/old/1.1.1/openssl-1.1.1.tar.gz
# 解压
tar -xvf openssl-1.1.1.tar.gz
# 创建openssl工作目录
mkdir -p /opt/openssl
cd openssl-1.1.1
## 执行编译脚本
./Configure --prefix=/opt/openssl --openssldir=/opt/openssl -fPIC -shared linux-x86_64 -Wl,--enable-new-dtags,-rpath,'/opt/openssl/lib';
## 编译安装
make && make install
# 添加变量
vi /etc/profile
export PKG_CONFIG_PATH=/opt/openssl/lib/pkgconfig
export LD_LIBRARY_PATH=/opt/openssl/lib
export OPENSSL_CONF=/etc/ssl
# 重新加载配置
source /etc/profile

# 修改动态链接文件
vi /etc/ld.so.conf.d/php-ssl.conf
## 添加如下内容
## /opt/openssl/bin
/opt/openssl/lib

# 清理缓存
ldconfig

# libicov-devel依赖通过二进制安装
wget http://ftp.gnu.org/pub/gnu/libiconv/libiconv-1.15.tar.gz
# 解压
tar -zxvf libiconv-1.15.tar.gz
# 创建工作目录
mkdir -p /opt/libiconv
# 执行脚本
./configure --prefix=/opt/libiconv
# 编译安装
make && make install
2、下载PHP源码包
wget http://mirrors.sohu.com/php/php-7.3.5.tar.gz3、解压
tar -zxvf php-7.3.5.tar.gz

# 创建工作目录
mkdir -p /opt/php
4、编译三部曲
# 执行脚本
./configure --prefix=/opt/php \
 --enable-mysqlnd \
 --with-mysqli=mysqlnd \
 --with-pdo-mysql=mysqlnd \
 --with-iconv-dir=/opt/libiconv \
 --with-jpeg-dir \
 --with-png-dir \
 --with-zlib \
 --with-libxml-dir=/usr \
 --enable-xml \
 --disable-rpath \
 --enable-bcmath \
 --enable-shmop \
 --enable-sysvsem \
 --enable-inline-optimization \
 --with-curl=/usr/include/x86_64-linux-gnu/curl \
 --enable-mbregex \
 --enable-fpm \
 --enable-mbstring \
 --with-gd \
 --with-openssl=/opt/openssl \
 --with-mhash \
 --enable-pcntl \
 --enable-sockets \
 --with-xmlrpc \
 --enable-soap \
 --enable-short-tags \
 --enable-static \
 --with-xsl \
 --with-fpm-user=nginx \
 --with-fpm-group=nginx \
 --enable-ftp \
 --enable-opcache=no

# 编译安装
make && make install
5、配置环境变量
ln -s /opt/php/sbin/php-fpm /usr/bin/php-fpm6、修改配置
cp /opt/php/etc/php-fpm.conf.default /opt/php/etc/php-fpm.conf
cp /opt/configure/php-7.3.5/php.ini-development /opt/php/lib/php.ini
cp /opt/php/etc/php-fpm.d/www.conf.default /opt/php/etc/php-fpm.d/www.conf

vi /opt/php/etc/php-fpm.conf
# 旧的配置
;pid = run/php-fpm.pid
# 修改为,“;”代表注释,需要删除
pid = /opt/php/php-fpm.pid
7、启动服务
# 编写启动脚本
vi /etc/systemd/system/php-fpm.service

[Unit]
Description=The PHP FastCGI Process Manager
After=syslog.target network.target

[Service]
Type=forking
PIDFile=/opt/php/php-fpm.pid
ExecStart=/opt/php/sbin/php-fpm
ExecStop=/bin/kill -9 php-fpm
ExecReload=/bin/kill -USR2 $MAINPID
PrivateTmp=true

[Install]
WantedBy=multi-user.target

# 启动服务
systemctl start php-fpm.service

# 设置开机自启动
systemctl enable php-fpm.service
8、测试
8.1 修改Nginx配置
# 修改配置
vi /opt/nginx/conf/extra/test.conf

server {
    listen  80;
    server_name localhost;

    location / {
        root /opt/www/html;
        index index.html;
    }
# 新增一个location
    location ~ .*\.(php|php5)?$ {
        root /opt/www/php;
        fastcgi_pass 127.0.0.1:9000;
        fastcgi_index index.php;
        include fastcgi.conf;
    }
}
8.2 重新加载配置
nginx -s reload8.3 创建php文件
# 创建php目录
mkdir -p /opt/www/php
# 创建index.php
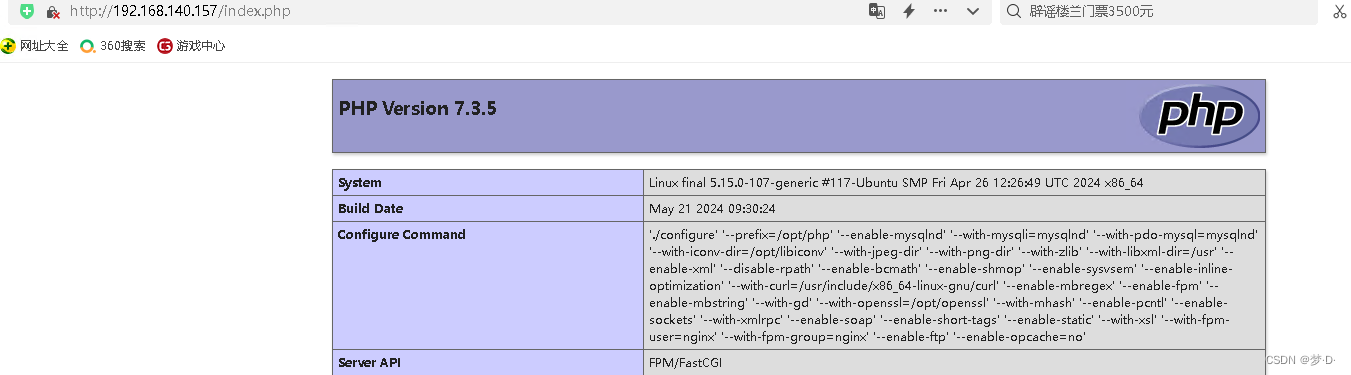
echo "<?php phpinfo();?>" > /opt/www/php/index.php8.4 浏览器输入IP/index.php
五、部署Redis服务
1、下载redis源码包
wget https://download.redis.io/releases/redis-5.0.12.tar.gz2、解压
tar -zxvf redis-5.0.12.tar.gz
mv redis-5.0.12 /opt/redis
3、编译安装
3.1 编译
cd /opt/redis
make
3.2 安装
make install3.3 初始化redis
# cd utils/

# ./install_server.sh
Welcome to the redis service installer
This script will help you easily set up a running redis server

Please select the redis port for this instance: [6379]
Selecting default: 6379
Please select the redis config file name [/opt/redis/6379.conf]
Selected default - /etc/redis/6379.conf
Please select the redis log file name [/var/log/redis_6379.log]
Selected default - /var/log/redis_6379.log
Please select the data directory for this instance [/var/lib/redis/6379]
Selected default - /var/lib/redis/6379
Please select the redis executable path [/usr/local/bin/redis-server]
Selected config:
Port           : 6379
Config file    : /opt/redis/6379.conf
Log file       : /var/log/redis_6379.log
Data dir       : /var/lib/redis/6379
Executable     : /usr/local/bin/redis-server
Cli Executable : /usr/local/bin/redis-cli
4、修改配置文件
4.1 修改配置文件
vi /opt/redis/6379.conf

# 修改如下内容
# bind 127.0.0.1
bind 0.0.0.0
# 配置密码
requirepass your_password
4.2 创建启动脚本
vi /etc/init.d/redis_6379


EXEC=/usr/local/bin/redis-server
CLIEXEC=/usr/local/bin/redis-cli
PIDFILE=/var/run/redis_6379.pid
CONF="/etc/redis/6379.conf"
REDISPORT="6379"
# 添加密码变量,密码需要和配置文件中设置的一致
PASSWORD="final123"

case "$1" in
    start)
        if [ -f $PIDFILE ]
        then
            echo "$PIDFILE exists, process is already running or crashed"
        else
            echo "Starting Redis server..."
            $EXEC $CONF
        fi
        ;;
    stop)
        if [ ! -f $PIDFILE ]
        then
            echo "$PIDFILE does not exist, process is not running"
        else
            PID=$(cat $PIDFILE)
            echo "Stopping ..."
            # 添加密码认证
            $CLIEXEC -p $REDISPORT -a $PASSWORD shutdown
            while [ -x /proc/${PID} ]
            do
                echo "Waiting for Redis to shutdown ..."
                sleep 1
            done
            echo "Redis stopped"
        fi
        ;;
    status)
        PID=$(cat $PIDFILE)
        if [ ! -x /proc/${PID} ]
        then
            echo 'Redis is not running'
        else
            echo "Redis is running ($PID)"
        fi
        ;;
    restart)
        $0 stop
        $0 start
        ;;
    *)
        echo "Please use start, stop, restart or status as first argument"
        ;;
esac
5、启动服务
/etc/init.d/redis_6379 start
# 支持stop、restart、status
6、测试
# 登录redis服务
[root@localhost opt]# redis-cli
127.0.0.1:6379> auth password
OK
六、部署PHP-Redis
1、安装依赖包
apt-get install php-dev2、下载php-redis源码包
下载地址:
https://github.com/phpredis/phpredis/releases/tag/6.0.2
3、解压
tar -zxvf phpredis-6.0.2.tar.gz4、编译安装
4.1 执行phpize
cd phpredis-6.0.2/
mkdir -p /opt/php-redis/

phpize
4.2 执行编译脚本
# --with-php-config 获取php配置信息,以方便正确编译和链接到PHP
./configure --prefix=/opt/php-redis/ --with-php-config=/opt/php/bin/php-config
4.3 编译
make4.4 安装
make install5、修改配置文件
vi /opt/php/lib/php.ini

# 添加如下内容
## 可以通过 find / -name "redis.so" 查找到所在路径
extension_dir="/opt/php/lib/php/extensions/no-debug-non-zts-20180731/"
extension=redis.so
6、重启PHP服务
systemctl restart php-fpm.service7、测试
7.1 编写测试脚本
vi /opt/www/php/redis.php

<?php
$redis = new redis();
$redis->connect("REDIS_IP","6379");
$redis->auth("YOUR_PASSWORD");
$redis->set("TEST","TEST-REDIS");
echo $redis->get("TEST");
?>
7.2 浏览器访问测试
