实验1:基于IP地址的虚拟主机
原理
-
如果一台服务器有多个IP地址,而且每个IP地址与服务器上部署的每个网站一一对应,当用户请求的IP地址不同,则会访问到不同网页,且每个网站都有一个独立的IP地址
-
注意:主机必须有多个IP地址
-
准备工作
[root@server ~]# setenforce 0

[root@server ~]# systemctl stop firewalld

[root@server ~]# systemctl disable firewalld

[root@server ~]# yum install nginx -y

[root@server ~]# systemctl start nginx

[root@server ~]# systemctl enable nginx
- 增加多个IP地址
[root@server ~]# nmcli connection modify ens160 +ipv4.addresses 192.168.80.150/24
[root@server ~]# nmcli connection modify ens160 +ipv4.addresses 192.168.80.151/24

[root@server ~]# nmcli connection up ens160  # 注意:一定要激活才能使用IP进行ssh连接


[root@server ~]# ip a
1: lo: <LOOPBACK,UP,LOWER_UP> mtu 65536 qdisc noqueue state UNKNOWN group default qlen 1000
    link/loopback 00:00:00:00:00:00 brd 00:00:00:00:00:00
    inet 127.0.0.1/8 scope host lo
       valid_lft forever preferred_lft forever
    inet6 ::1/128 scope host
       valid_lft forever preferred_lft forever
2: ens160: <BROADCAST,MULTICAST,UP,LOWER_UP> mtu 1500 qdisc mq state UP group default qlen 1000
    link/ether 00:0c:29:9e:1d:25 brd ff:ff:ff:ff:ff:ff
    altname enp3s0
    inet 192.168.80.129/24 brd 192.168.80.255 scope global noprefixroute ens160
       valid_lft forever preferred_lft forever
    inet 192.168.80.150/24 brd 192.168.80.255 scope global secondary noprefixroute ens160
       valid_lft forever preferred_lft forever
    inet 192.168.80.151/24 brd 192.168.80.255 scope global secondary noprefixroute ens160
       valid_lft forever preferred_lft forever
    inet6 fe80::20c:29ff:fe9e:1d25/64 scope link noprefixroute
       valid_lft forever preferred_lft forever
- 创建网页目录,并上传网页数据
[root@server ~]# mkdir -p /www/sxhkt
[root@server ~]# mkdir -p /www/zy

#使用mobaxterm上传网页
- 创建子配置文件,通过include导入主配置
#在/etc/nginx/conf.d目录下建立子配置文件实现,更加精简,执行时会被主配置文件加载
[root@server ~]# vim /etc/nginx/conf.d/vshost.conf
server {
        listen  80;
        server_name  192.168.80.150;
        root     /www/sxhkt;
}
server {
        listen  80;
        server_name  192.168.80.151;
        root    /www/zy;
}
- 重启服务,测试
[root@server ~]# systemctl restart nginx

#在Windows端浏览器上输入IP地址


实验2:基于端口号的虚拟主机
原理
- 基于端口号的虚拟主机功能,可以让用户通过一个IP地址的不同端口号来访问不同的网站
- 准备工作
#先恢复快照
[root@server ~]# setenforce 0

[root@server ~]# systemctl stop firewalld

[root@server ~]# systemctl disable firewalld

[root@server ~]# yum install nginx -y

[root@server ~]# systemctl start nginx

[root@server ~]# systemctl enable nginx
- 新建2个网页目录
[root@server ~]# mkdir -p /www/sxhkt
[root@server ~]# mkdir -p /www/zy

#使用mobaxterm上传网页
- 编辑主配置文件
[root@server ~]# vim /etc/nginx/nginx.conf
    server {
        listen       8080;
        server_name  _;
        root         /www/sxhkt;

        # Load configuration files for the default server block.
        include /etc/nginx/default.d/*.conf;

        error_page 404 /404.html;
        location = /404.html {
        }

        error_page 500 502 503 504 /50x.html;
        location = /50x.html {
        }
    }

    server {
        listen       8181;
        server_name  _;
        root         /www/zy;

        # Load configuration files for the default server block.
        include /etc/nginx/default.d/*.conf;

        error_page 404 /404.html;
        location = /404.html {
        }

        error_page 500 502 503 504 /50x.html;
        location = /50x.html {
        }
    }
- 重启服务,测试
[root@server ~]# systemctl restart nginx

#在Windows端浏览器上输入IP地址+端口号


实验3:基于域名的虚拟主机
原理
-
当服务器无法给每个网站都分配一个独立的IP地址时,可以通过用户请求的域名不同来实现访问不同网页
-
准备工作
#先恢复快照
[root@server ~]# setenforce 0

[root@server ~]# systemctl stop firewalld

[root@server ~]# systemctl disable firewalld

[root@server ~]# yum install nginx -y

[root@server ~]# systemctl start nginx

[root@server ~]# systemctl enable nginx
- 新建2个网页目录
[root@server ~]# mkdir -p /www/sxhkt
[root@server ~]# mkdir -p /www/zy

#使用mobaxterm上传网页
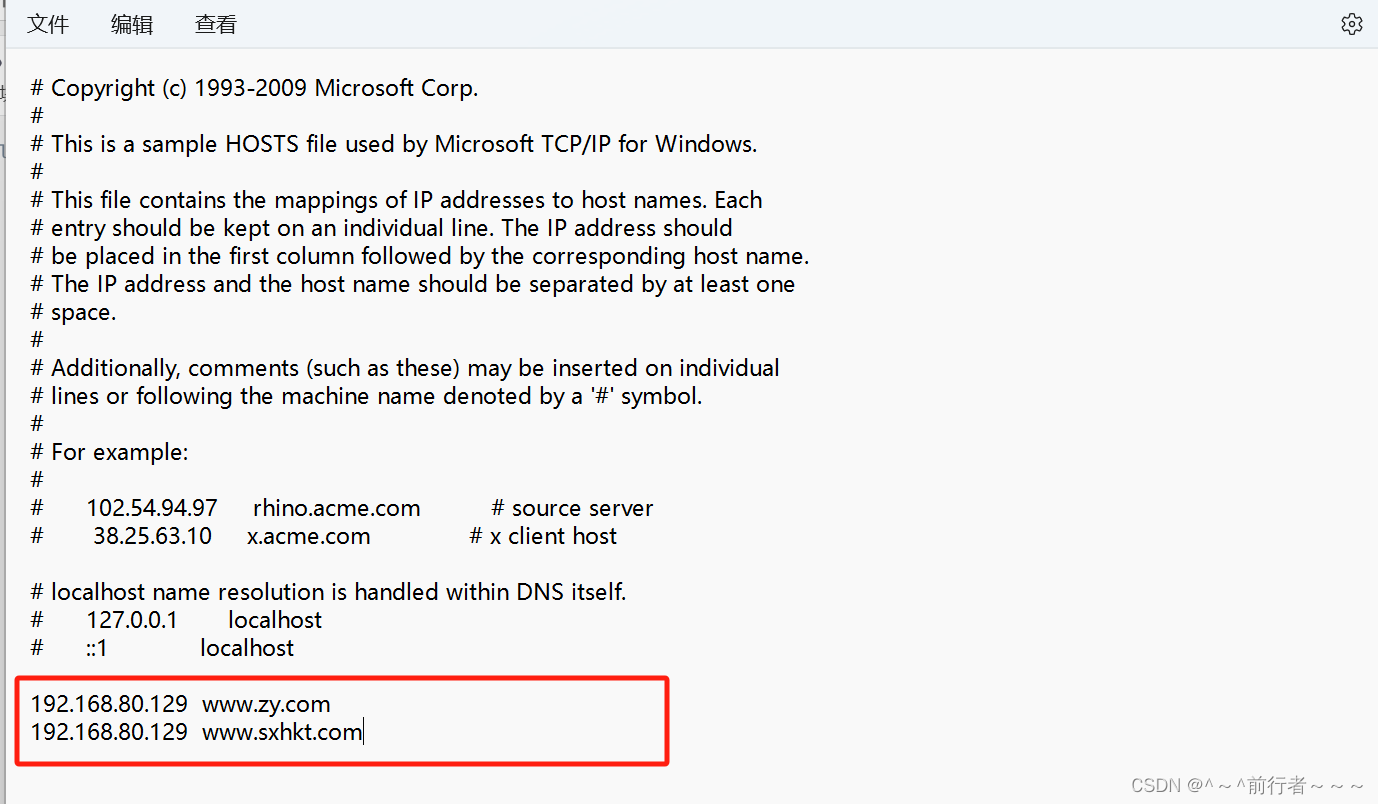
- 手动配置Windows中hosts文件IP地址与域名的映射关系
- 修改主配置文件
[root@server ~]# vim /etc/nginx/nginx.conf
    server {
        listen       80;
        server_name  www.sxhkt.com;
        root         /www/sxhkt;

        # Load configuration files for the default server block.
        include /etc/nginx/default.d/*.conf;

        error_page 404 /404.html;
        location = /404.html {
        }

        error_page 500 502 503 504 /50x.html;
        location = /50x.html {
        }
    }

    server {
        listen       80;
        server_name  www.zy.com;
        root         /www/zy;

        # Load configuration files for the default server block.
        include /etc/nginx/default.d/*.conf;

        error_page 404 /404.html;
        location = /404.html {
        }

        error_page 500 502 503 504 /50x.html;
        location = /50x.html {
        }
    }
- 重启服务,测试
[root@server ~]# systemctl restart nginx

#在Windows端浏览器上输入域名